
- This limits the visual’s result set to records containing values stored in the keyset.
- Apply keyset filters to visuals from the same or different data sources. However, the data source for the target visual must contain a field storing the same kind of data as the keyset’s key field.
- You can update a keyset at any time by uploading new values for the keyset.
When working with multiple filter types on the same visual or filter snippet, row-level filters (including wildcard filters) are applied first to a visual or filter snippet, keyset filters are applied second, and group filters are applied last on the aggregated result set.
- Create a Keyset
- Create a Keyset From the Visual Result Set
- Create a Keyset From a Data Point
- Create a Keyset From a CSV File
- Review and Apply a Keyset as a Visual Filter
- Delete a Keyset
- Upload Keyset Data From a CSV File Using the API
- Update Keyset Values From a CSV File Using the API
Create a Keyset
You can create a keyset in several ways. Keysets are shared by all users of your Self-Service Analytics instance.- Create a Keyset From the Visual Result Set
- Create a Keyset From a Data Point
- Create a Keyset From a CSV File
- Update Keyset Values From a CSV File Using the UI
Create a Keyset From a CSV File
You can create a keyset from a CSV file. The CSV file must meet the following requirements:- The data values in the file must be in a single column.
- The file must be UTF-8 formatted.
- The file cannot contain more than 1000 rows.
- The data type of the CSV values (number, time, attribute, etc.) must match the data type of the field to which the CSV keyset data will be applied.
- Review a visual in the Visual Gallery or in a dashboard.
-
Select the filter icon on the visual or dashboard to access the appropriate filter sidebar.
-
To access the visual filter sidebar, select its filter icon (
 ) or select Settings from the visual menu (
 ) and then select
  on the sidebar menu.
-
To access the dashboard filter sidebar, select its filter icon (). The dashboard-level filter icon is available only when all the visuals are from the same data source.
-
To access the visual filter sidebar, select its filter icon (
- Select Add Filter.
-
Select a filter field on the Filter sidebar. Remember that the field data type must match the data type of the CSV data you will upload (for example, if the field is a numeric field, the CSV data must be also be numeric).
The Filters sidebar displays three tabs:
- The Value tab allows you to select values for the filter.
- The Wildcard tab allows you to specify a row-level wildcard filter for the visual.
-
The Keyset tab allows you to select a keyset for the filter or to upload a CSV file as a keyset.
If your example uses numeric data, the tabs may vary. See Set a Numeric Field Filter.
- Select the Keyset tab. The keysets and saved filters defined in your environment are listed.
-
Select Upload Keyset Values. An Upload Keyset Values panel appears in the Filters sidebar allowing you to specify information about the CSV file and the keyset you are creating.
If the upload file contains more records than are allowed by your Self-Service Analytics environment configuration, the keyset will not upload and an error occurs.
- Enter a name for the keyset in the Name box. Because the keyset will be shared by all users of your Self-Service Analytics instance, be sure to enter a unique name.
- Optionally, enter a description for the keyset in the Description box.
-
In the Choose a file to Add Keyset Values box, browse for and select the CSV file containing the keyset values you want to upload.
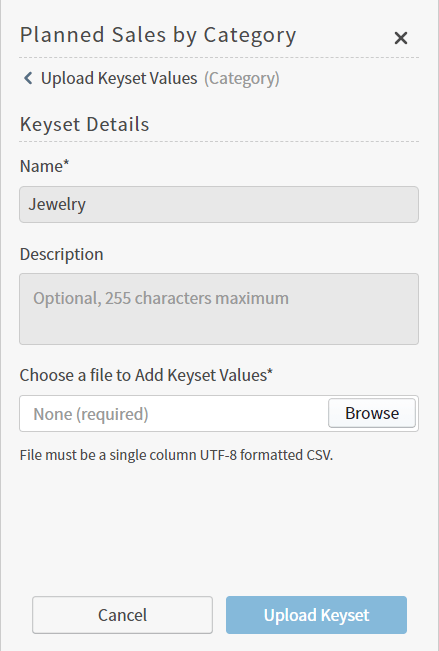
- Select Upload Keyset to upload the CSV file for the keyset. If the upload occurs successfully, a message displays that the upload was successful and the keyset details appear in the Filter sidebar. The keyset is now available to all users of your Self-Service Analytics instance.
- When you are finished setting your filter values, select Continue and examine your updates. If they are correct, select Apply.
Create a Keyset From a Data Point
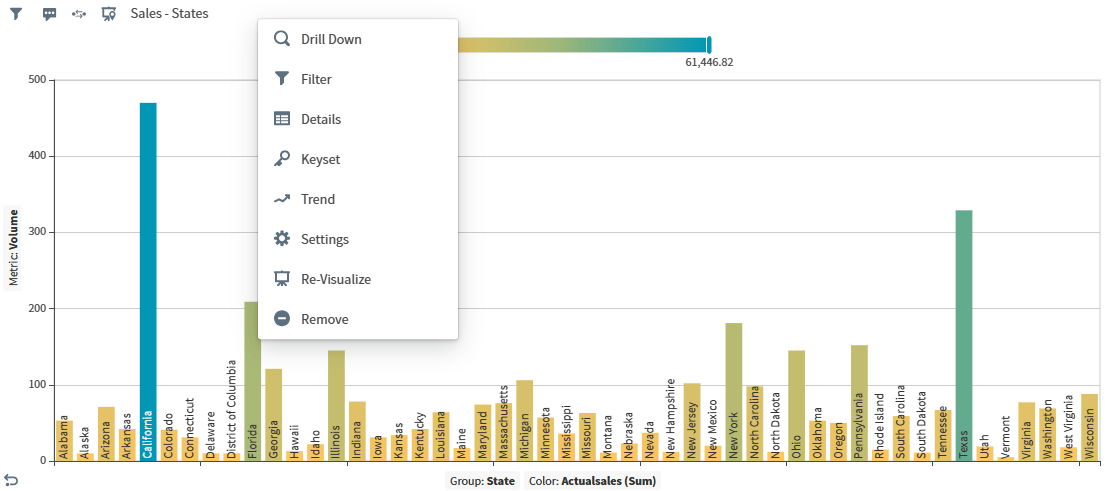
You can create a keyset from a data point in a visual using the context menu. The result set used for the keyset is automatically filtered by the data point you select. Create a keyset from a data point- Create a visual.
-
Select a data point in the visual. The context menu appears:
-
Select Keyset. The Save Keyset dialog appears.
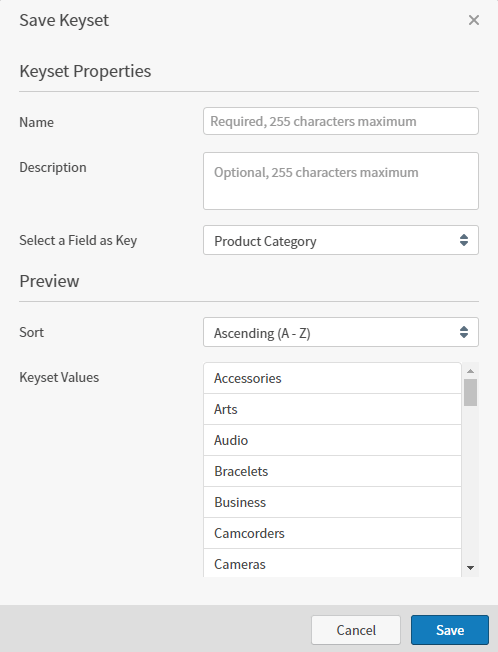
- Enter a name for the keyset in the Name box. The keyset is shared by all users of the Self-Service Analytics instance, and must be a unique name.
- Optionally, enter a description for the keyset in the Description box.
- In the Select a Field as Key box, select a field to use as the key for the keyset. This should be the field by which the original visual was grouped. A list of keyset values for the field you selected appears on the Save Keyset dialog. These values can include an empty value.
- Select Save to save the keyset.
Create a Keyset From the Visual Result Set
You can create a keyset from the result set of a visual. Filtering the visual data before creating the keyset will limit the unique data values included in the keyset. Create a keyset from a visual result set-
Create a visual and filter it as desired.
-
Select and then Create Keyset from the visual drop-down menu. The Save Keyset dialog appears.
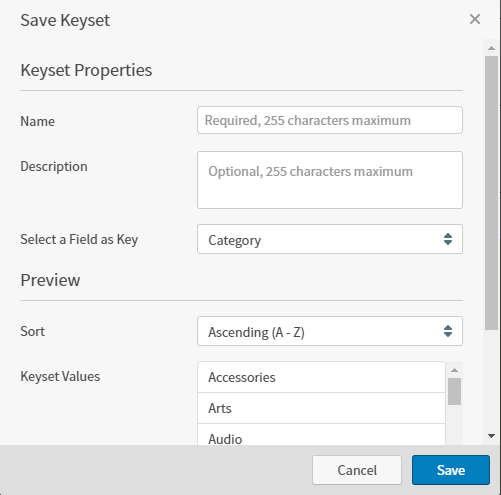
- Enter a name for the keyset in the Name box. Because the keyset will be shared by all users of the Self-Service Analytics instance, be sure to enter a unique name.
- Optionally, enter a description for the keyset in the Description box.
- In the Select a Field as Key box, enter the field that should be used as the key for the keyset. A list of keyset values for the field you selected appears on the Save Keyset dialog. These values can include an empty value.
- Select Save to save the keyset.
Update Keyset Values From a CSV File Using the UI
You can update the values of a keyset from a CSV file. The CSV file must meet the following requirements:- The data values in the file must be in a single column.
- The file must be UTF-8 formatted.
- The file cannot contain more than 1000 rows.
- The data type of the CSV values (number, time, attribute, etc.) must match the data type of the field to which the CSV keyset data will be applied.
- Review a visual in the Visual Gallery or in a dashboard.
-
Select the filter icon on the visual or dashboard to access the appropriate filter sidebar.
-
To access the visual filter sidebar, select its filter icon () or select Settings from the visual menu () and then select on the sidebar menu.
-
To access the dashboard filter sidebar, select its filter icon (). The dashboard-level filter icon is available only when all the visuals are from the same data source.
-
To access the visual filter sidebar, select its filter icon (
- Select Add Filter or, if the keyset is already used to filter the visual, select the keyset name. If you select Add Filter, proceed to the next step. If you select the keyset name, the keyset details are displayed and you should skip to Step 6 of this procedure.
-
Select the filter field on the Filter sidebar. Remember that the field data type must match the data type of the CSV data you will upload (for example, if the field is a numeric field, the CSV data must be also be numeric).
The Filters sidebar displays three tabs:
- The Value tab allows you to select values for the filter.
- The Wildcard tab allows you to specify a row-level wildcard filter for the visual.
- The Keyset tab allows you to select a keyset for the filter or to upload a CSV file as a keyset.
- Select the Keyset tab. The keysets and saved filters defined in your environment are listed.
-
Select the keyset to which you want to reupload keyset values. The keyset details appear.
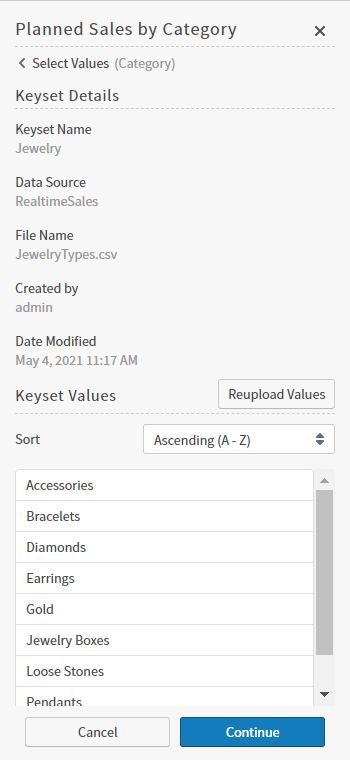
-
Select Reupload Values. An Upload Keyset Values panel appears in the Filters sidebar allowing you to specify information about the CSV file and the keyset you are updating.
-
In the Choose a file to Add Keyset Values box, browse for and select the CSV file containing the updated keyset values you want to upload.
If the upload file contains more records than are allowed by your environment configuration, the keyset will not upload and an error occurs.
- Select Upload Keyset to upload the CSV file for the keyset. If the upload occurs successfully, a message displays that the upload was successful and the keyset details appear in the Filter sidebar. The keyset is now available to all users of this instance.
- When you are finished setting your filter values, select Continue and examine your updates. If they are correct, select Apply.
Update Keyset Values From a CSV File Using the API
You can update keyset data from a CSV file using the API. Use thePUT /api/keysets/upload/<keyset-id> API endpoint to do this. The keyset ID was assigned when the keyset was initially uploaded using a CSV file. See Upload Keyset Data From a CSV File Using the API.
It should be in the following format. A header should not be included.
https://<Self-Service Analytics-URL>/composer/swagger-ui.html.
Upload Keyset Data From a CSV File Using the API
You can upload keyset data from a CSV file using the API. Use thePOST /api/keysets/upload API endpoint to do this. The CSV file must provide the field name, file data, the file name, the keyset name, and the data source definition ID. A keyset description is optional.
You must be the owner of the keyset or be a user with the Administer Dashboards privilege.
The CSV file should be in the following format. A header should not be included.
https://<Self-Service Analytics-URL>/composer/swagger-ui.html.
Review and Apply a Keyset as a Visual Filter
You can review and apply a keyset as a visual filter to visuals that use the same or different data sources. Visuals are limited to records containing values stored in the keyset. You can update a keyset at any time by uploading new values for the keyset.To apply a keyset to a visual, the data source for the target visual must include a field storing the same data as the key field used for the keyset. The key field is defined when the keyset is created. See Create a Keyset.
-
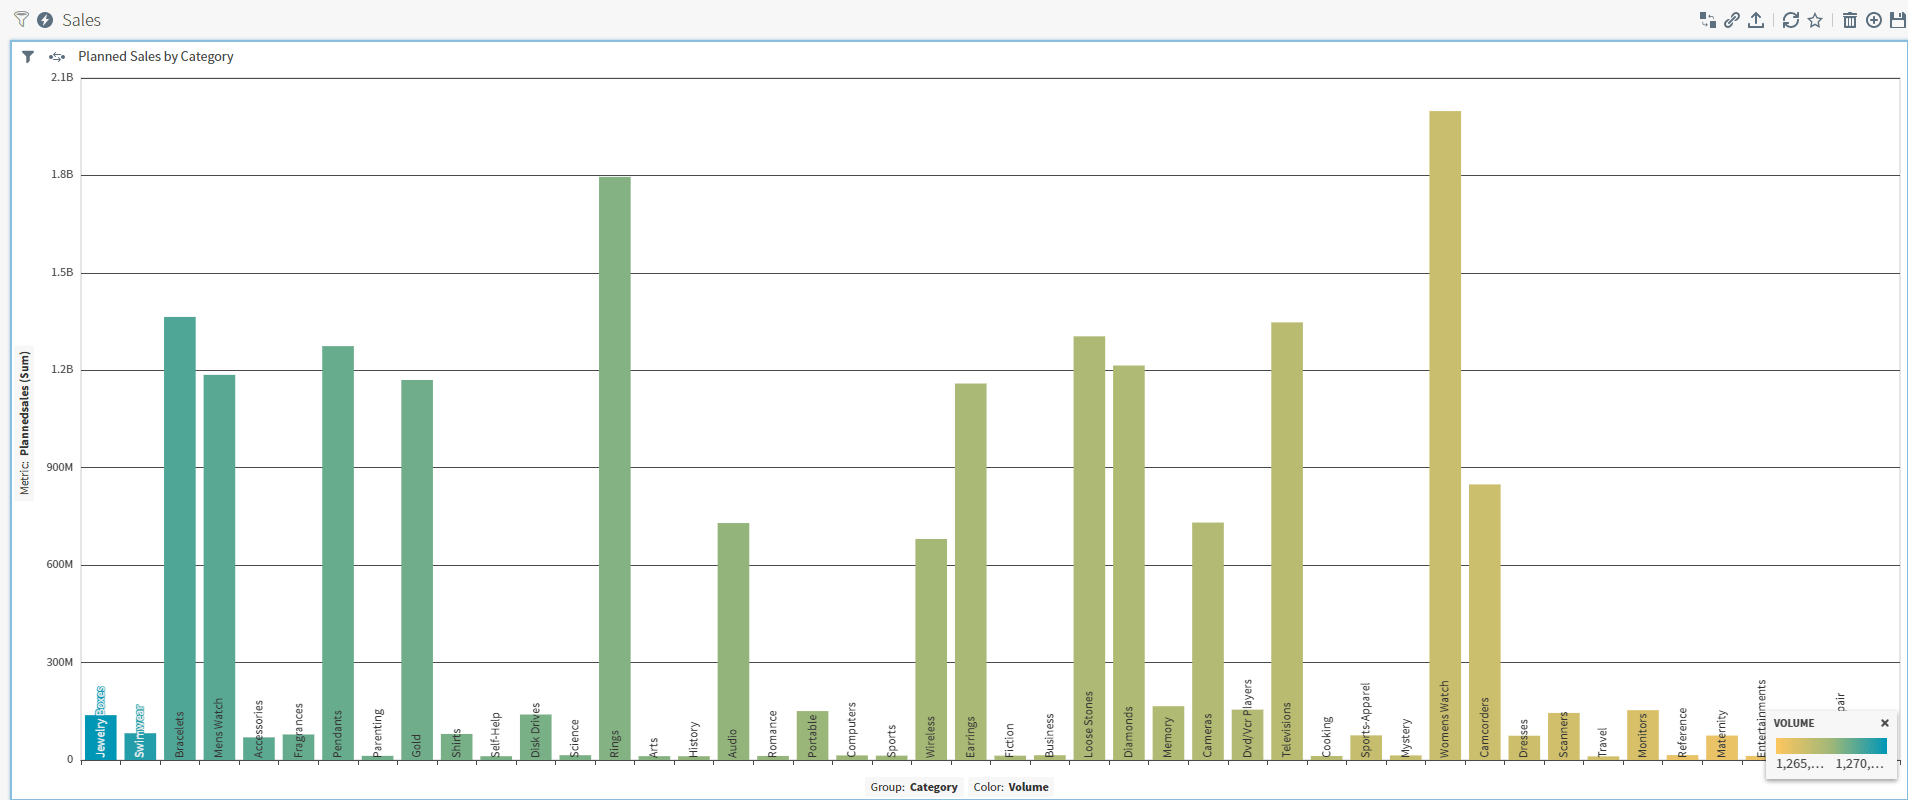
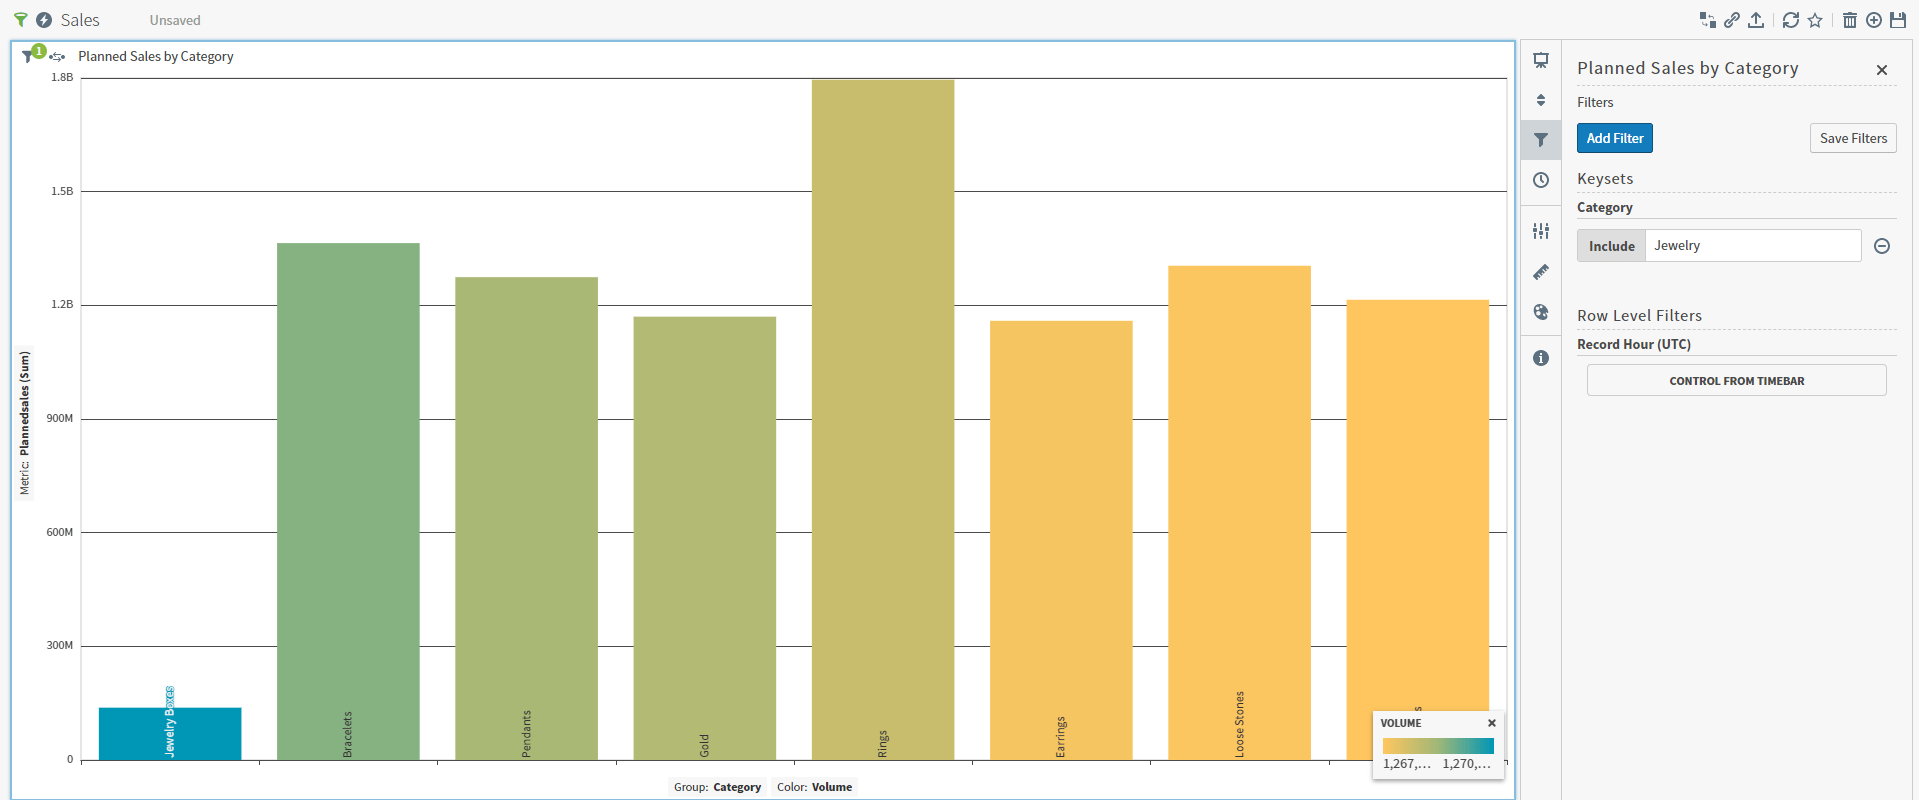
For the purposes of this procedure, suppose you want to list the planned sales for jewelry.Take a keyset containing a list of jewelry (see Create a Keyset), and apply it to a bar chart showing planned sales by category.
-
Select the filter icon on the visual or dashboard to access the appropriate filter sidebar.
-
To access the visual filter sidebar, select its filter icon () or select Settings from the visual menu () and then select on the sidebar menu.
-
To access the dashboard filter sidebar, select its filter icon (
 ). The dashboard-level filter icon is available only when all the visuals are from the same data source.
-
To access the visual filter sidebar, select its filter icon (
- Select Add Filter.
-
Locate the data field in the Filters sidebar list that contains the same kind of data as the data in the keyset you want to use. In our example, it is Category.
The Filters sidebar displays three tabs:
- The Value tab allows you to select values for the filter.
- The Wildcard tab allows you to specify a row-level wildcard filter for the visual.
-
The Keyset tab allows you to select a keyset for the filter or to upload a CSV file as a keyset.
This example uses a non-numeric filter. See Set a Numeric Field Filter.
-
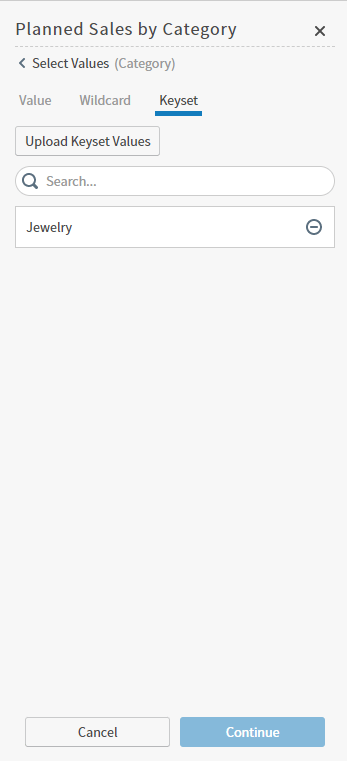
Select the Keyset tab. The keysets and saved filters defined in your environment are listed.
-
Select the keyset you want to apply. Details about the keyset appear on the Filters sidebar.
 ) in the Preview area. This sort has no effect on the visual result set when the keyset is applied.
-
When you are finished setting your filter values, select Continue and examine your updates. If they are correct, select Apply.
The visual is filtered by the keyset data.
Delete a Keyset
You can only delete a keyset if it is not used by any visual in the environment.Keysets can only be deleted by the user account that created them or by any Self-Service Analytics user belonging to a group with the Administer Dashboards privilege. In addition, they can only be deleted if they are not used by any visual in the environment.
-
Select the filter icon on the visual or dashboard to access the appropriate filter sidebar.
-
To access the visual filter sidebar, select its filter icon () or select Settings from the visual menu () and then select the filter () icon on the sidebar menu.
-
To access the dashboard filter sidebar, select its filter icon (). The dashboard-level filter icon is available only when all the visuals are from the same data source.
-
To access the visual filter sidebar, select its filter icon (
- Select Add Filter.
- Locate and select the field in the Filters sidebar to which the keyset applies. A second page with a Keyset tab appears in the Filters sidebar.
- Select the Keyset tab. The keysets defined in your environment that apply to the field you have selected are listed.
-
Select the delete icon (
 ) next to the keyset name. A warning dialog appears.
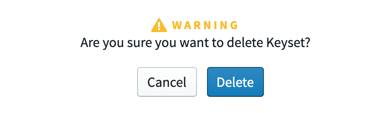
- Select Delete. The keyset is deleted.