
There are two ways to store nested structure:
- Store all hierarchy as a single document, for example, in JSON format (nested documents).
- Store hierarchy items as separate documents and additional info on hierarchical links internally (block join).
Nested Documents
Hierarchical structure can be represented in JSON format. In MongoDB and Elasticsearch, storing such structures is supported. Consider the following example. We need to store a hierarchy of divisions by country with two divisions in country. Also we need to store some general country information, for example, foundation year. In this case, the following JSON is sent to the index document:Block Join Support
There is another way to store hierarchical structures. All hierarchy items are stored as separate elements, with information about the hierarchical links stored internally. Apache Solr supports this approach. Consider the following example. We need to store a hierarchy of divisions by country with two divisions in country. Also we need to store some general country information, for example, foundation year. In this case, the following JSON is sent to the index document:Visualize Schemas and Joins
Visualize the fields and tables in schemas included with your connection, and created by other users. Add relationships as needed. Visualize join nodes in your data sources. When you create join nodes in a source, you can visualize and update your joins as well. See Fuse Data Sources.Edit and View Relationships in Schemas
Users with appropriate permissions can view and edit the relationships using the Relationship tab for a supported connection. Select a schema from the list in the drop-down, then make and save any additions to the relationships as needed.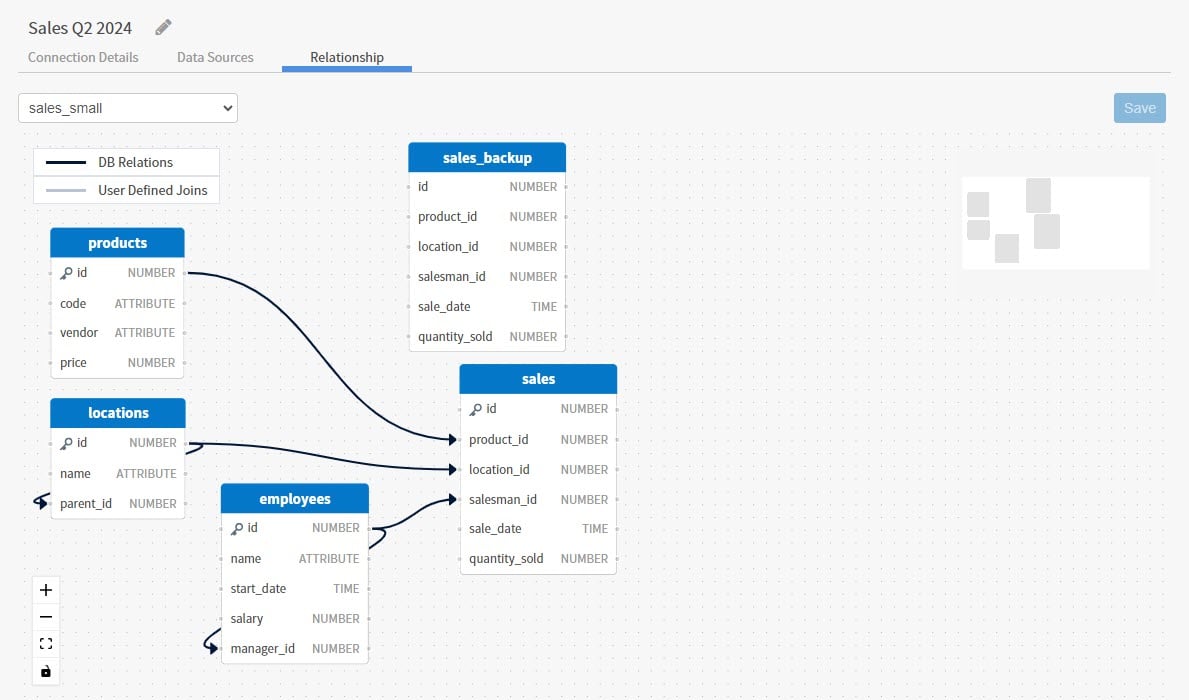
- Open a supported connection and navigate to the Relationship tab. A work area opens you can use to navigate among the tables and relationships of a selected schema.
- Select an available schema from the drop-down list. Larger data sets may take a few moments to load.
- View the existing relationships and any user defined relationships.
-
Optionally, draw more relationships in this work area, then Save your changes.
To remove a user-applied join node, double-click to select the join node, then select the backspace key. The relationship is removed.
- View or edit as many schemas as you need.
For Postgres connections, both tables and data relationship information are read from the connection. Other supported connections include table information but do not read relationship information. See Connector Support for Schema Visualization. No information is provided for unsupported connections.
View Relationships of a Schema in a Source
You can view the relationships present in schemas you are using in your sources that use a supported connection. The Source Creation tab of the source includes a Schema drop-down you can use to select a schema for the source, with a view button that opens the work area.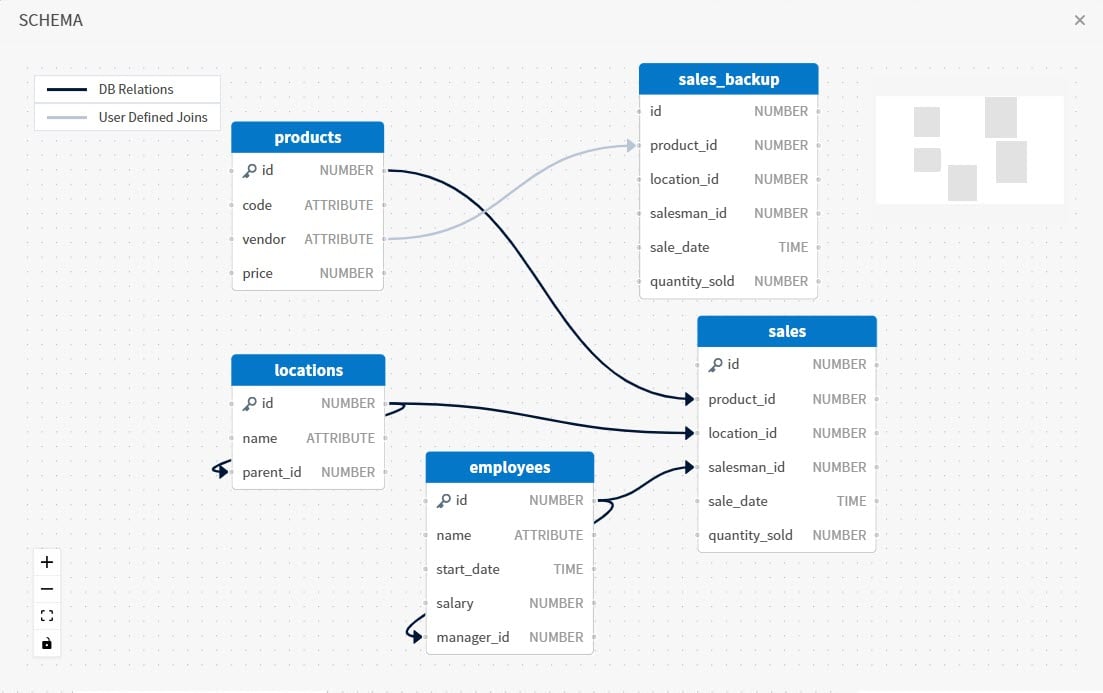
- Create or edit a source that uses a schema.
- Select the view icon next to your selected Schema. A schema work area opens you can use to view the tables and relationships of that schema. Larger data sets may take a few moments to load.
- View the existing relationships and any user defined join nodes to better understand the relationships present.
- Close the schema or join nodes modal when you’re done viewing the schema information, and repeat for other schemas if needed.