
- an administrator.
- User in a group that has been granted the Administer Sources privilege.
- User in a group that has been granted the Manage Source Permissions privilege who also has read permission for the data source.
Security Conflicts
Row Security
If a user is included in more than one row security filter for the same data source (via group, user, or account specifications), an error message appears when they try to view a dashboard using the data source. The error is shown because the row restriction conflicts set by the different row security filters. If the user is included more than once in a single row security filter (either as an explicit user, a member of more than one group, or as a member of the account), no error occurs because it is a single row security filter. A “Data Unavailable” message appears when an error occurs obtaining data from a data source for a row security filter. If a row security filter returns no results, a “No search results” message appears.Column Security
If a user is included in more than one column security filter for the same data source, a most permissive model for the filter is used. For example, if a user is a member of two groups, Group A and Group B, and- Column filters restrict Group A from using Field A
- Column filters restrict Group B from using Field B
/api/sources/<source-id>/security/filters.
API documentation is provided in your environment at this link: https://<Self-Service Analytics-URL>/composer/swagger-ui.html.
This section covers the following topics:
Add Row Security Definitions
Add row security to restrict the data source data that can be viewed or used by a group, user, or account.- Log in as a user in a group that has been granted the Administer Sources privilege, or a user in a group that has been granted the Manage Source Permissions privilege and who also has read permission for the data source. If you are logged in as a tenant admin, verify you’re in or switch to the appropriate tenant.
- Select the Sources card on your home page or Data Sources from the main menu. The Sources page appears.
- Locate the data source for which you want to restrict data access and select the icon in the Row column for the data source. The Row Security dialog appears.
-
Select Add Filter. The Row Security dialog fills with information about the data source you selected.
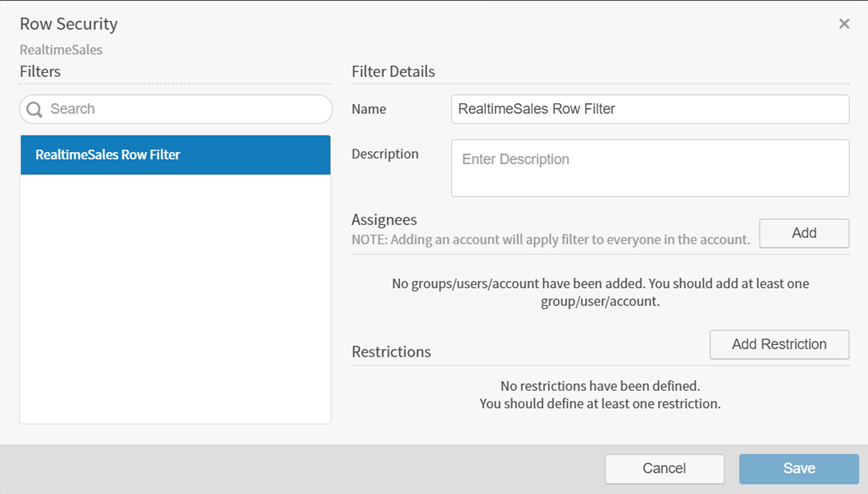
- Specify a name for the row security definition in the Name field. This name will be used to distinguish one row security field definition from another in the Row Security dialog.
- Optionally, use the Description field to supply a description for the row security definition.
-
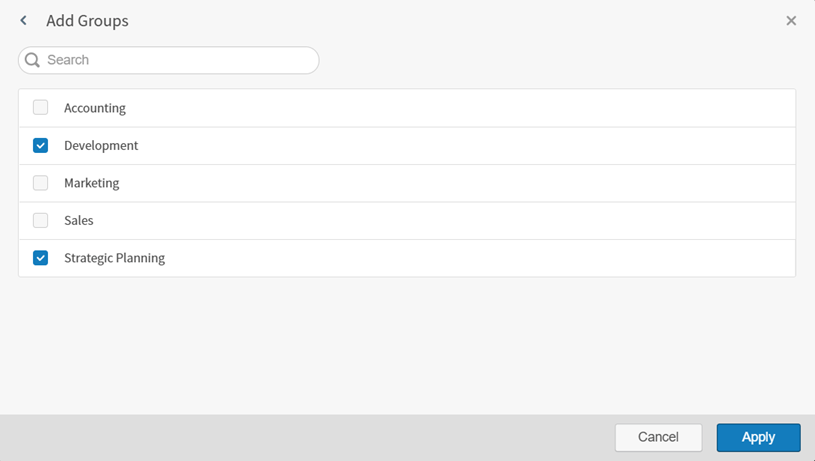
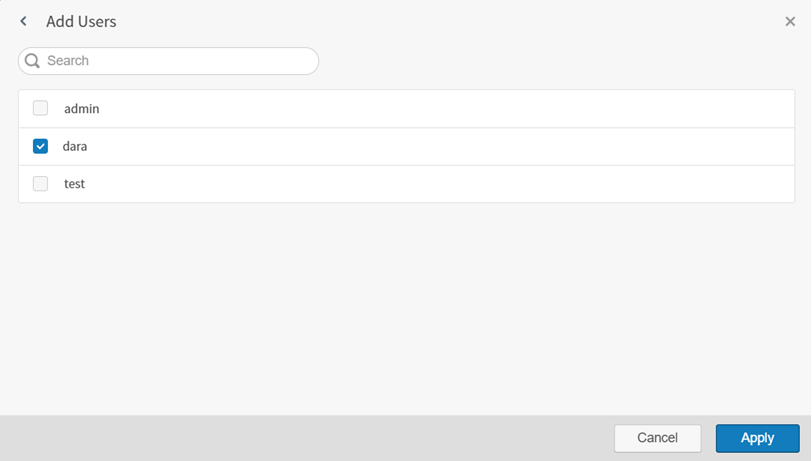
Select Add to select accounts, groups, or users to which the row security definition applies. Then select Groups, Users, or Tenant from the drop-down list.
The behavior of the dialog varies depending on what you select.
-
If you select Groups, the Add Groups panel appears.
-
If you select Users, the Add Users panel appears.
- If you select Tenant, the tenant in which you are working is added to the Row Security dialog. You can only add your current account to the row security definition. After that, the Tenant option is disabled.
-
If you select Groups, the Add Groups panel appears.
- Repeat Step 7 until all users, tenants, and groups are selected for the row security filter.
-
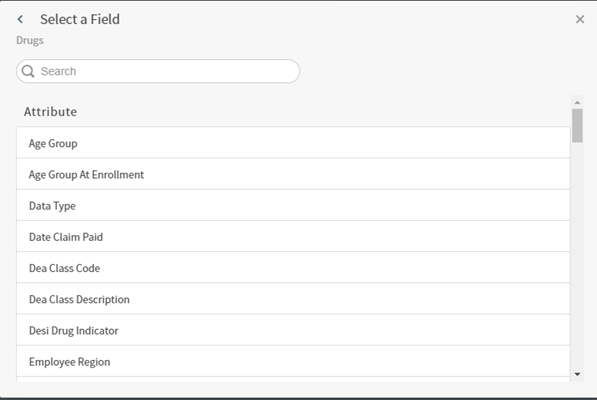
Select Add Restriction to add at least one restriction to the row security definition. The Select a Field dialog appears.
-
Select a field for the restriction filter on the Select a Field dialog. A Select Values dialog appears with fields that vary, depending on the type of field you selected: attribute, number, or time. Derived fields are included in the list of fields and can be selected for a row security filter.
Attribute Fields
If the field you selected is an attribute, the Select Values dialog looks something like this: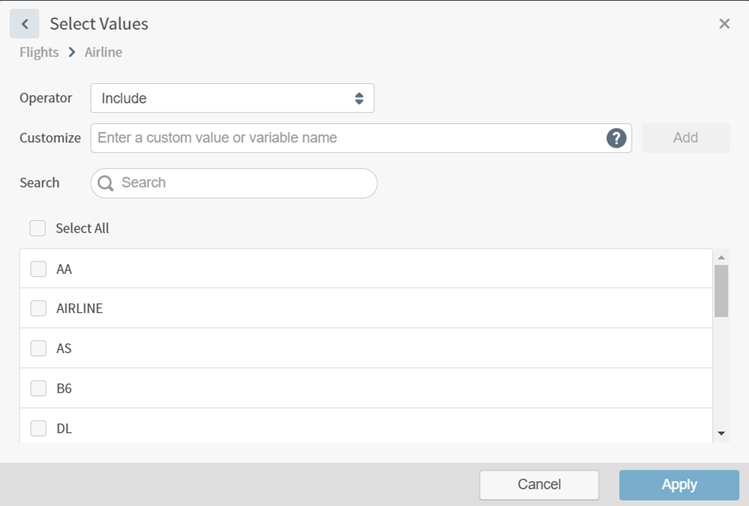
- Select the filter operator (Include or Exclude, depending on whether you want to include or exclude the value from the data).
- Specify an optional custom value. To create and select a custom value, enter the value in the Customize field and select Add. Your custom field is added and selected in the list of possible values. To remove the custom value, uncheck it in the list of possible values. It is removed from the filter and from the list of possible values for the filter. You can insert variables as values for the attribute filter. See Insert Variables for Row Security Restriction Filters.
- Select one or more values from the list of available values for the attribute you selected. To select all values, select Select All.
Number Fields
If the field you select is a numeric field, the Select Values dialog looks something like this: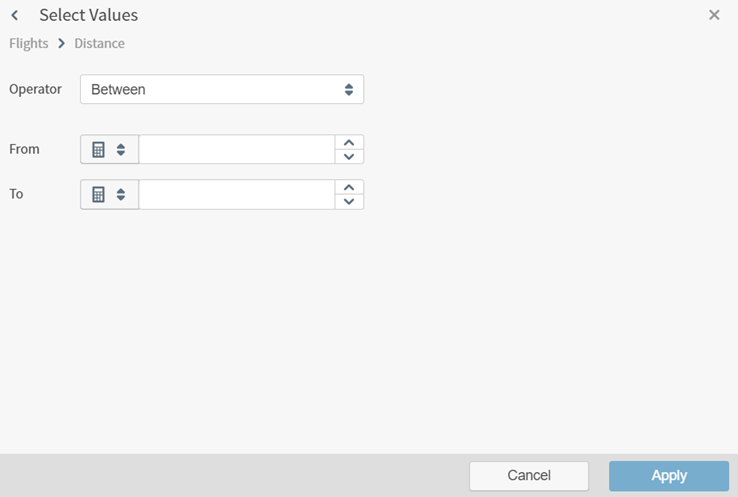
- Select a relational comparison operator in the Operator selection box. Data is included in the visual when the data in the filter field meets the condition set by the relational operator and the numeric values you specify. Valid numeric operators are described in Operators.
- Use the arrows in the From and To boxes to increase and decrease the maximum and minimum values. You can insert variables as values for the numeric filter. See Insert Variables for Row Security Restriction Filters.
Time Fields
If the field you select is a time field, the Select Values dialog looks something like this: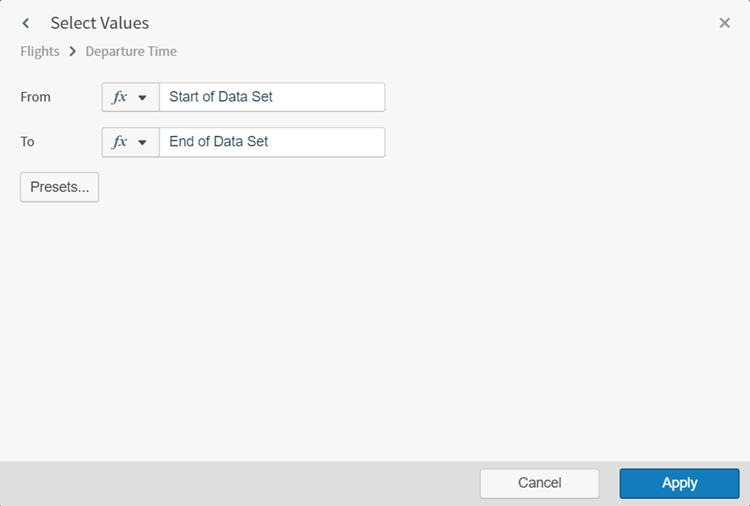
-
Select Static Time, Dynamic Time, or Variables in the fx drop-down menu.
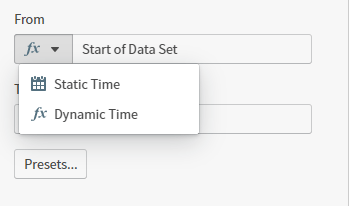
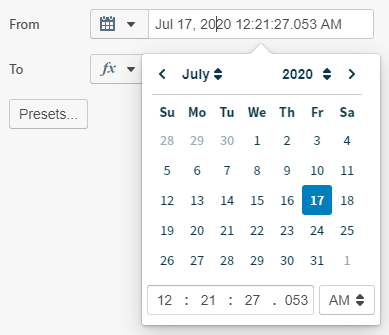
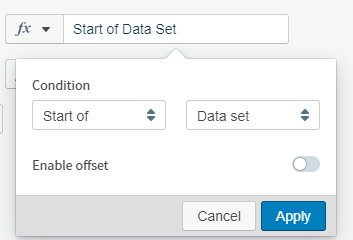
-
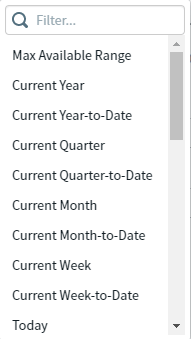
Alternatively, select Presets… to fill the From and To boxes with predefined time ranges provided by Self-Service Analytics.
- To remove a restriction from the security definition, select the delete icon next to the restriction.
- Repeat Steps 9-10 if additional restrictions are needed. All restrictions for a row security definition are listed on the Row Security dialog.
- When you are finished data restrictions for the group, select Save to save the row security definition.
- Repeat Steps 4-13 to add more row security definitions for the data source.
- When all row security definition modifications have been made, select Close to close the Row Security dialog.
Modify Row Security Definitions
Modify row security for a data source- Log in as a user in a group that has been granted the Administer Sources privilege, or a user in a group that has been granted the Manage Source Permissions privilege and who also has read permission for the data source. If you are logged in as a tenant admin, verify you’re in or switch to the appropriate tenant.
- Select the Sources card on your home page or Data Sources from the main menu.. The Sources page appears.
-
Locate the data source for which you want to restrict data access and select the icon in the Row column for the data source. The Row Security dialog appears.
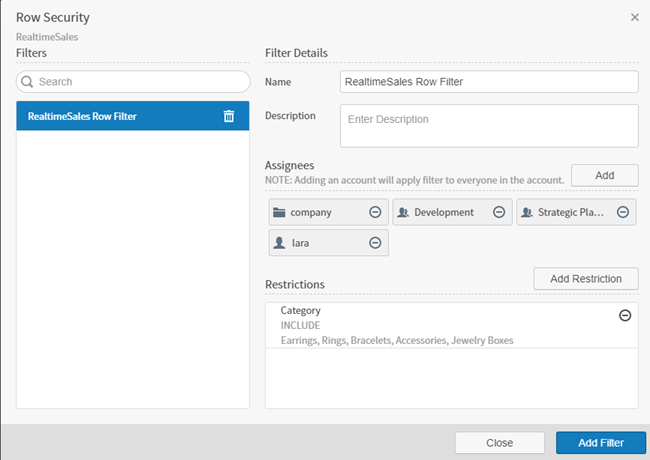
- To modify a row security definition, select it on the left side of the Row Security dialog. The settings for the definition appear in the Filter Details on the right side of the dialog and can be modified.
- Modify any of the information for the row security definition, as described in Add Row Security Definitions. When you are finished, select Save to save the row security settings.
- When all row security definition modifications have been made, select Close to close the Row Security dialog.
Remove Row Security Definitions
Remove row security for a data source- Log in as a user in a group that has been granted the Administer Sources privilege, or a user in a group that has been granted the Manage Source Permissions privilege and who also has read permission for the data source. If you are logged in as a tenant admin, verify you’re in or switch to the appropriate tenant.
- Select the Sources card on your home page or Data Sources from the main menu. The Sources page appears.
-
Locate the data source and select the row icon in the Row column for the data source. The Row Security dialog appears.
- Locate the row security definition you want to remove (delete) on the left side of the Row Security dialog and select the delete icon next to its name.
- Select Delete on the confirmation dialog. The row security definition is removed.
- When all row security definition modifications have been made, select Close to close the Row Security dialog.
Insert Variables for Row Security Restriction Filters
Variables can be inserted as values for any restriction filter in a row security definition. The variables are passed to the connection string via custom attributes specified in the user definition or dynamically in the custom attributes specified in the SAML or LDAP configurations for your Self-Service Analytics installation. You can also specify user attributes for use in the connection parameters of a connection definition. See Use User Attributes for Connection Parameters.If a you use a variable in a row security definition, but do not define a corresponding custom attribute the user, an error message appears when the user attempts to view a dashboard on which the row security is applied.
Step 1: Define Custom Attributes for the Variables
A custom attribute must be defined for every variable you want to use. The only exceptions are the Self-Service Analytics context variables${User.composerUserName}, ${User.accountId}, and ${User.credentials}. These built-in attributes which automatically exist and can be used connect the currently logged in user.
You can define custom attributes in several ways:
- Individually for every user. If you use this method, the variable names must be the same for every user. See Specify Custom User Attributes.
- Dynamically in the LDAP or SAML configurations for your Self-Service Analytics instance. See Use Lightweight Directory Access Protocol (LDAP) and Configure Self-Service Analytics to Support SAML.
Step 2: Using Variables in Row Security
Use variables in row security- Log into Self-Service Analytics as a user in a group that has been granted the Administer Sources privilege, or a user in a group that has been granted the Manage Source Permissions privilege and who also has read permission for the data source.
-
Follow the instructions in Restrict Access to Data Using Row and Column Security to add or modify a row security definition. When you get to the step where you select values for the restriction filter, specify the custom attribute (variable) you defined in Step 1 as a value for the filter. If custom attributes are defined, they can be directly entered using the following syntax:
- Save the row security definition and close the Row Security dialog, as described in Restrict Access to Data Using Row and Column Security.
Row Security Filter Errors
When a custom user attribute, used as a variable in a row security filter, is invalid (for example, it cannot be parsed as a value of a required type), a generic error message is given and a detailed message is logged describing what is wrong with the row security filter.Restrict Access to Fields Using Column Security
If a user is included in more than one column security filter for the same data source, a most permissive model for the filter is used. Column security is supported by the API endpoint/api/sources/<source-id>/security/attributes.
API documentation is provided in your environment at this link: https://<Self-Service Analytics-URL>/composer/swagger-ui.html.
This section covers the following topics:
- Add Column Security Definitions
- Modify Column Security Definitions
- Remove Column Security Definitions
Add Column Security Definitions
Add column security to restrict data source fields that can be viewed or used by the group.- Log in as a user in a group that has been granted the Administer Sources privilege, or a user in a group that has been granted the Manage Source Permissions privilege and who also has read permission for the data source. If you are logged in as a tenant admin, verify you’re in or switch to the appropriate tenant.
- Select the Sources card on your home page or Data Sources from the main menu.. The Sources page appears.
- Locate the data source for which you want to restrict field access and select the icon in the Column column for the data source. The Fields Security dialog appears.
-
Select Add Filter. The Fields Security dialog fills with information about the data source you selected.
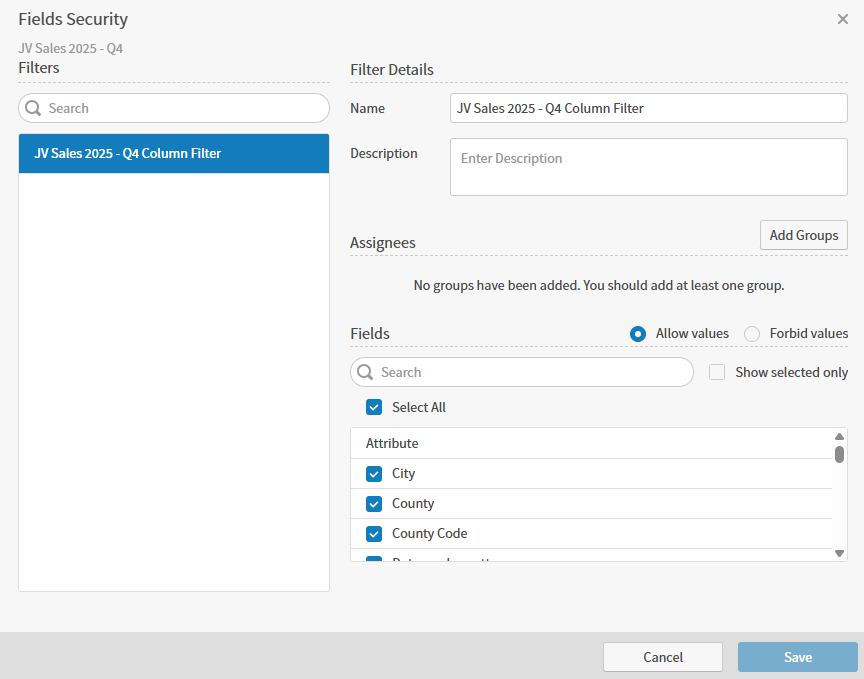
- Specify a name for the column security definition in the Name field. This name will be used to distinguish one column security definition from another here.
- Optionally, use the Description field to supply a description for the column security definition.
- Select Add Groups to select one or more groups to which the column security definition applies. The Add Groups dialog appears.
-
Select one or more groups for the column security filter. You can search for group names using the search box at the top of the dialog. When you have finished selecting groups, select Apply.
The groups appear under Assignees on the Column Security dialog. If you want to remove a group from the filter, select
 next to the group name in the Assignees section.
- Select fields in the Fields list to be visible to the members of the selected groups. By default, all fields are selected, and all values are allowed (the Allow values option is selected). Check or clear (uncheck) fields, then optionally select Forbid values to forbid selected fields, or leave Allow values selected to allow your selected fields. Use the Search bar to search for fields in the list. To see only the fields you have selected in the list, select Show selected fields only. To see all fields in the list (including fields you have not selected), clear (uncheck) Show selected fields only.
- When you are finished selecting data source fields that can be visible to the groups, select Save to save the column security definition.
- Repeat Steps 4-9 to add more column security definitions.
- When all column security definition modifications have been made, select Close to close the Column Security dialog.
Modify Column Security Definitions
Modify column security to restrict the data source fields that can be viewed or used by the group.- Log in as a user in a group that has been granted the Administer Sources privilege, or a user in a group that has been granted the Manage Source Permissions privilege and who also has read permission for the data source. If you are logged in as a tenant admin, verify you’re in or switch to the appropriate tenant.
- Select the Sources card on your home page or Data Sources from the main menu. The Sources page appears.
-
Locate the data source and select the column icon in the Column column for the data source. The Fields Security dialog appears.
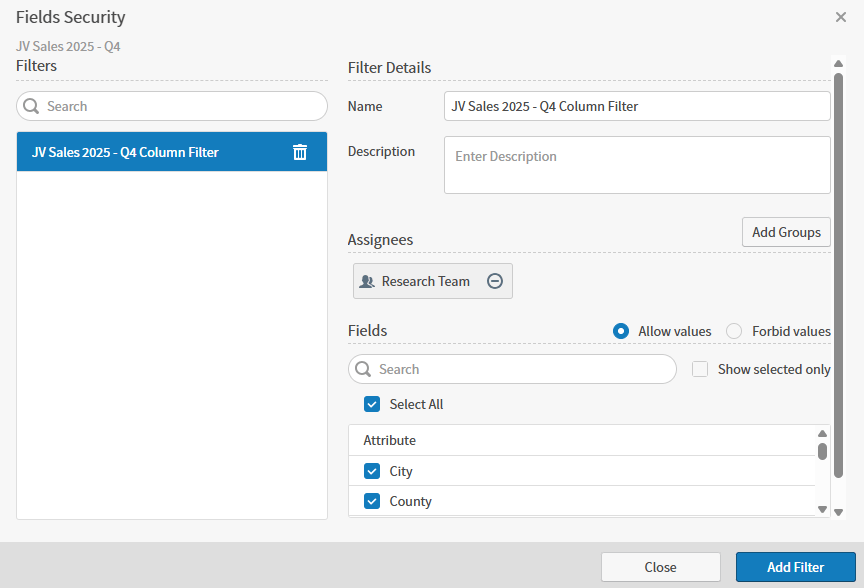
- To modify a column security definition, select it on the left side of the Field Security dialog. The settings for the definition appear in the Filter Details on the right side of the dialog and can be modified.
- Modify any of the information for the column security definition, as described in Add Column Security Definitions. When you are finished, select Save to save your settings.
- When all column security definition modifications have been made, select Close to close the dialog.
Remove Column Security Definitions
Remove column security for a data source- Log in as a user in a group that has been granted the Administer Sources privilege, or a user in a group that has been granted the Manage Source Permissions privilege and who also has read permission for the data source. If you are logged in as a tenant admin, verify you’re in or switch to the appropriate tenant.
- Select the Sources card on your home page or Data Sources from the main menu.. The Sources page appears.
-
Locate the data source and select the icon in the Column column for the data source. The Fields Security dialog appears.
-
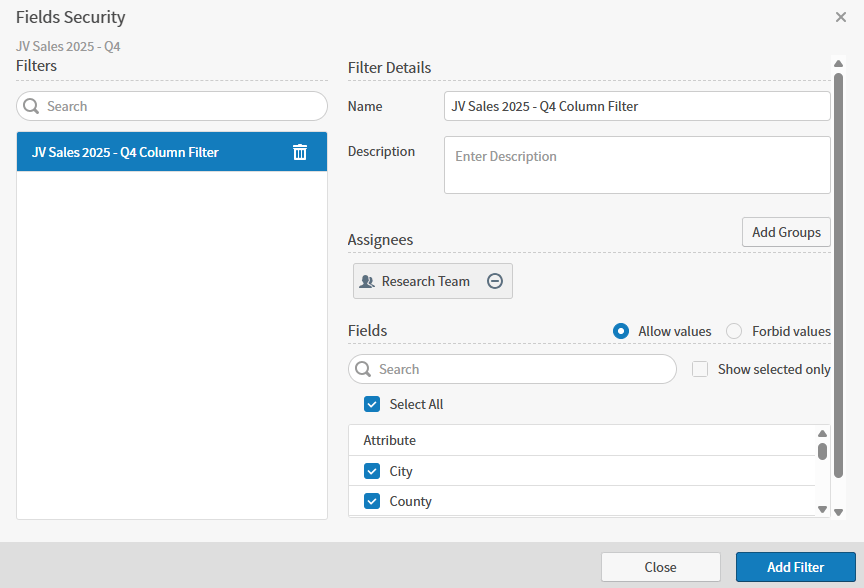
Locate the column security definition you want to remove (delete) on the left side of the Column Security dialog and select
 next to its name.
- Select Delete on the confirmation dialog. The column security definition is removed.
- When all column security definition modifications have been made, select Close to close the Column Security dialog.