
In this release, when your admin enables the Enhanced Experience user interface, you will see changes to workflows you may have used in previous releases. If you are running an earlier release or your admin has not enabled the new interface, see Source Creation Tab (Earlier Releases).
Source Creation Tab
If you are upgrading from an earlier version, you may temporarily see the earlier interface until you create, edit, or update a source. See Source Creation Tab (Earlier Releases) for interface information.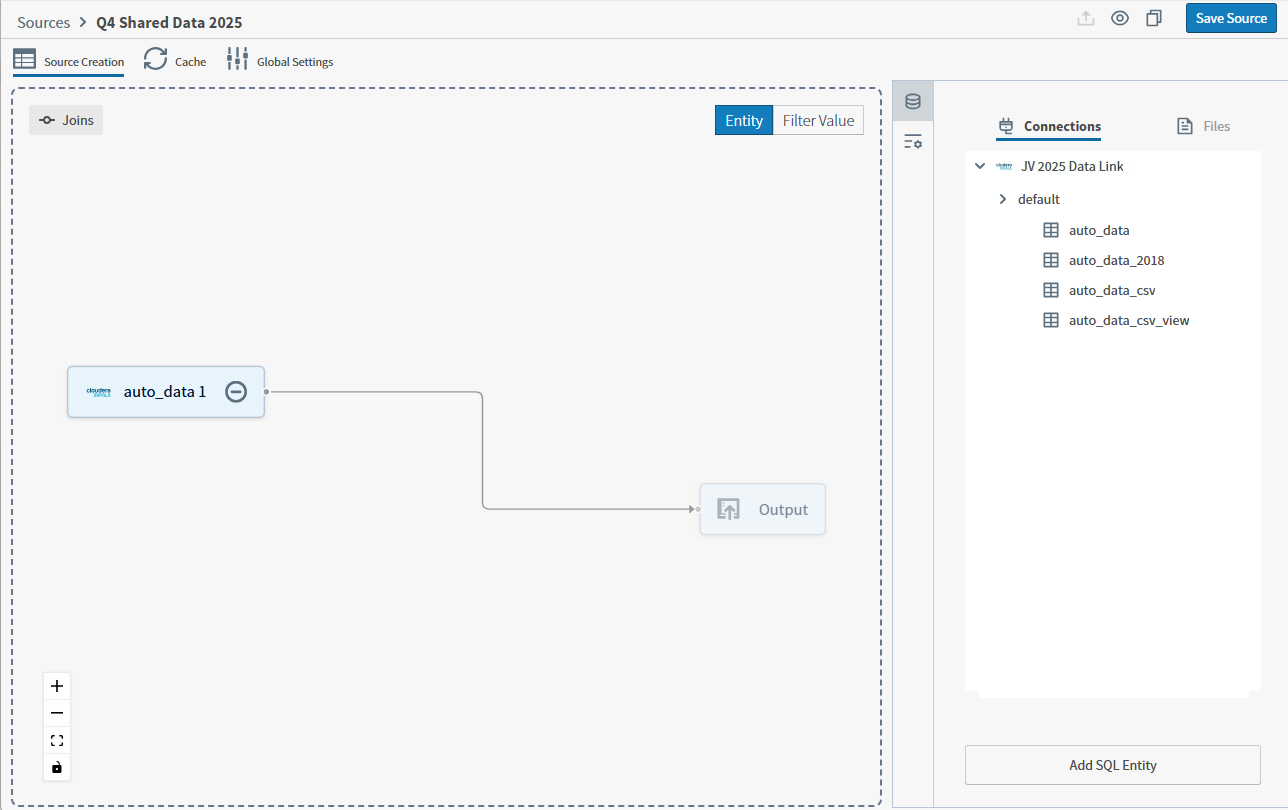
You must be logged in as user with the Administer Sources or Create New Data Sources privilege to see the Source Creation tab, or have Read and Write permissions on the source.
When you upload a flat file, Select Schema and Select Entity fields are not present, and the option to create Custom SQL is not available. You can instead Select File, Edit File, and configure API Endpoints.
- Edit and update the name of this source in the top left the work area.
- Export, Preview, Copy, or Save the source using the available icons in the top right of the work area.
- Build your source by dragging one or more entities from you connections or files by dragging and dropping them from the Connections or Files tabs in the right panel to the source work area in the left panel.
- Use the Connections and Files tabs to build your source from available entities, uploaded files, or to add an SQL entity as needed.
- If you add multiple entities, you can manage the Joins directly in the work area.
Source Work Area (Left Panel)
Drag and drop data entities to build your source. After adding a data entity or making changes, select Save Source to save your changes, or Preview Source to preview your data.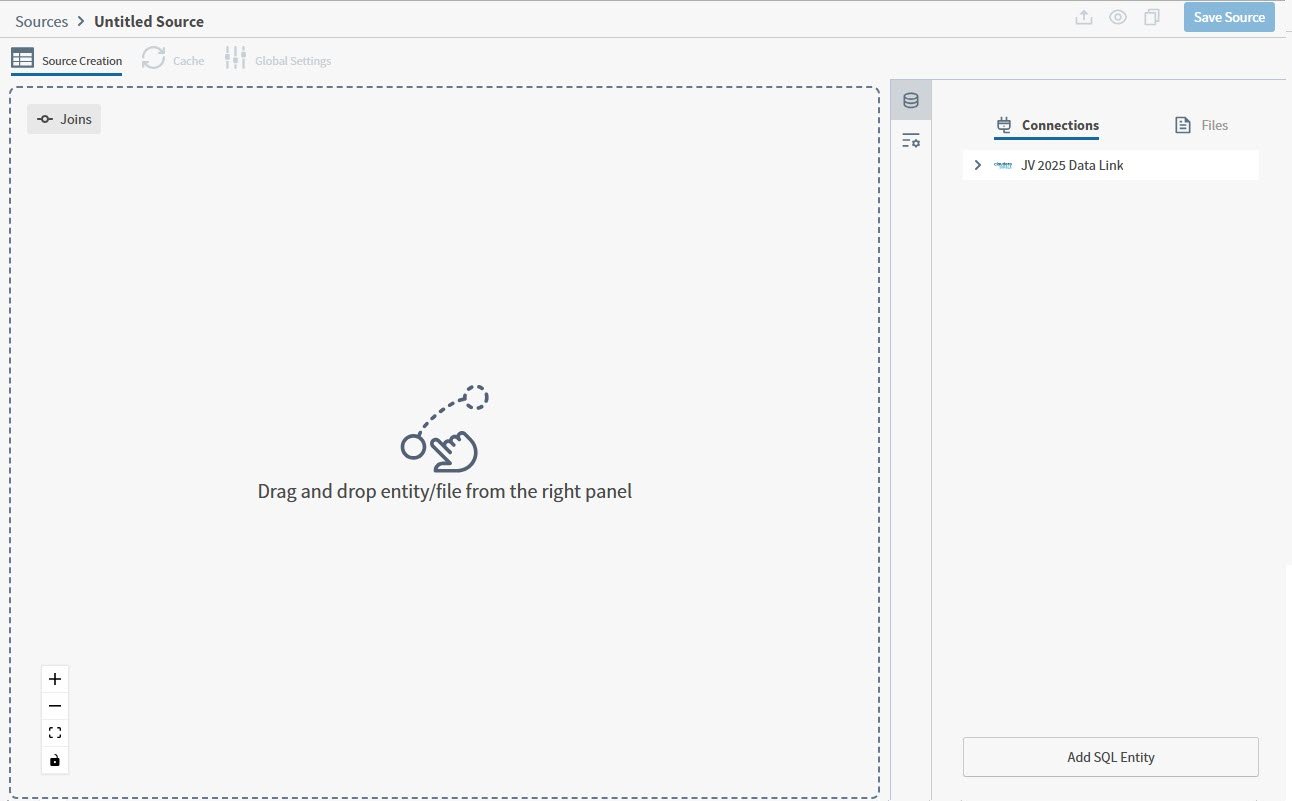
Connections Panel
Available connections are listed in the Connections panel. Select the arrows to open and find entities and indices to drag and drop to the source work area. The added entity is represented visually, making it easier for you to make direct changes or create joins when multiple entitles are included in the source.Alternatively, select Add SQL Entity to use Custom SQL to define your entities and indices in this source.
When you create a connection from a flat file, Select Schema and Select Entity fields are not present, and the option to create Custom SQL is not available. You can instead select a file to edit it or configure API Endpoints.
Entity Details - From Connection
Each entity you add is given a unique Entity Name, appended by a number. Select an entity to edit its properties in the Properties panel, and manage details of how the information is accessed and presented.Depending on the your source, different options are available to define it.
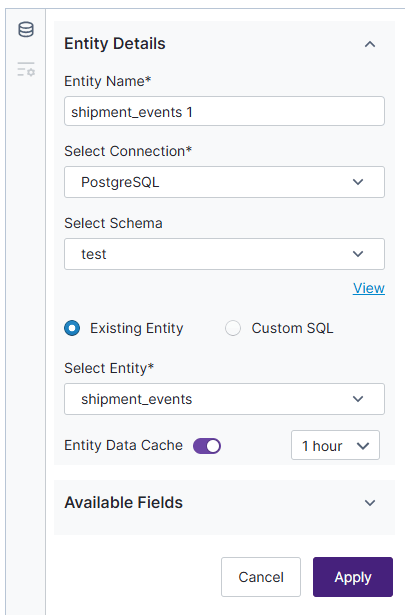
- Entity Name: The unique name for this data entity. By default, a name is generated for the entity name, appended by a number.
- Select Connection: Select a connection for this data entity. The connection currently selected is shown, but you can change that. You will only see connections you have access to.
- Select Schema: If a Schema is available for your connection, you can select a schema to filter a list of entities for this connection. See Connector Feature Support. Visualize your schema by selecting the view option. See View Relationships of a Schema in a Source.
-
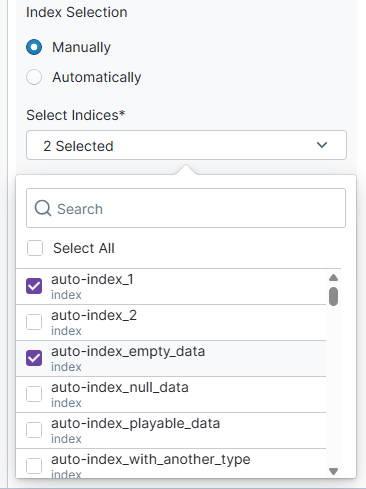
Select Indices: ElasticSearch connections support Indices: select one or more to include.
-
Index Selection: Select Manually to create a merged list of fields from selected indices, or Automatically to select a pattern that automatically selects indices.
-
Index Selection: Select Manually to create a merged list of fields from selected indices, or Automatically to select a pattern that automatically selects indices.
-
Existing Entity and Custom SQL:
- Select Existing Entity to use an available entity from your source.
- Custom SQL: Select to define a custom SQL to retrieve the data you want from your source. Select Entity is not available if you select Custom SQL.
-
Select Entity: Select an available entity.
- Available Fields: All fields available from this source are included by default. Disable (uncheck) specific fields to exclude them from the source. The fields, when disabled, are not included for your users. If you attempt to remove a field currently in use by a visual or other object, Self-Service Analytics will prevent you from saving your changes to the data source.
-
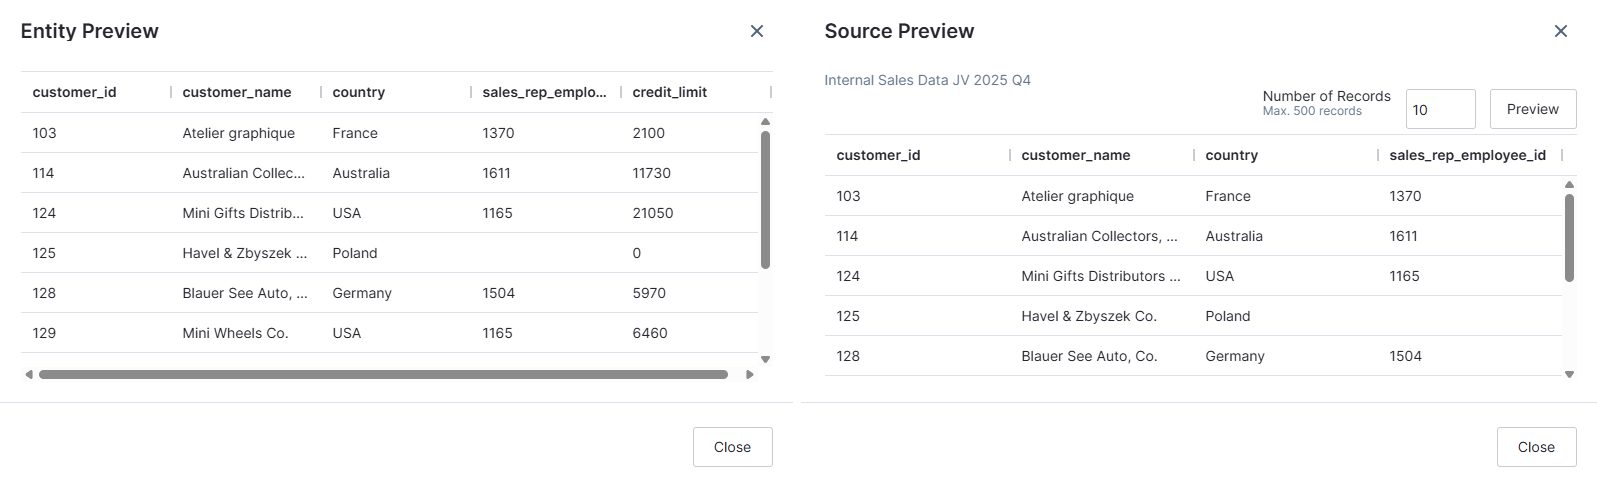
Entity Preview table: Select the Preview icon in the Available Fields work area. This opens an Entity Preview dialog pop up. This preview includes all of the fields in the entity (no matter your selections) to help you decide what to include or exclude.
In the example shown here, the credit_limit field is deselected in Available Fields. It is visible in the Entity Preview table, but not the Source Preview table.The Preview icon next to the Save Source button opens a Source Preview. This preview only includes what fields you have made available after applying your field selections and saving your work.
Custom SQL
When you select this option, a Custom SQL editing pane opens that you can use to write and run your SQL query. If you prefer a larger work area, select the Open editor option to open a larger editing canvas. After you have run a successful query, the results populates Available Fields and the Preview table, and you can Apply your changes. You can not save invalid SQL. Table visuals and Details dialogs display fields in the order they are retrieved from the source. When you create a source using custom SQL, your fields are shown in the order you specify.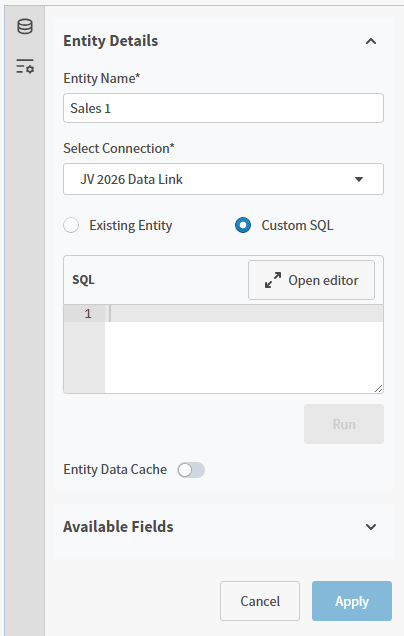
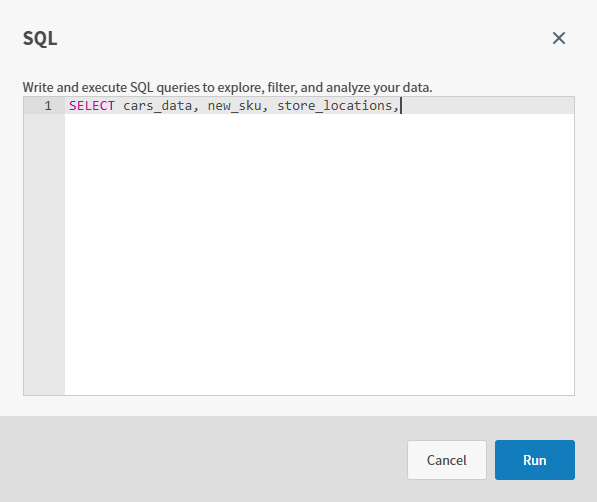
Use the grab bars at the corner of the editing field to extend your viewable area.
state customer user attribute to filter source data for records from whatever state the user’s state custom user attribute is set to. If a state custom user attribute is not defined for a user, a default of Alabama is used.
Data Entity Details - From File
Each entity you add is given a unique Entity Name, appended by a number. Select an entity to edit its properties in the Properties panel, and manage details of how the information is accessed and presented.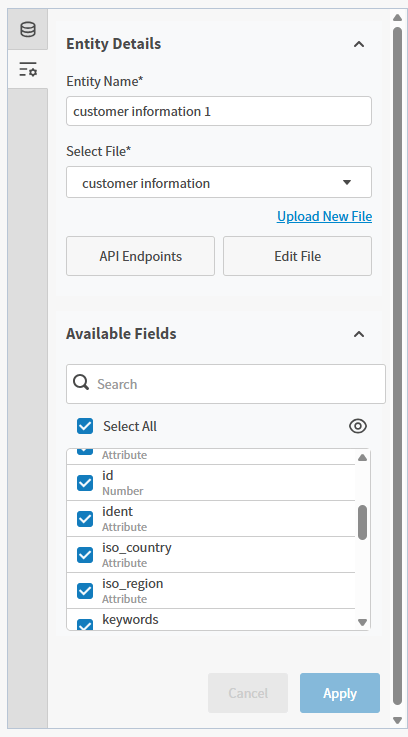
- Entity Name - The unique name for this data entity. By default, a name is generated for the entity name, appended by a number.
- Select File: Select an available uploaded file for this data entity. A list of all native fields from this entity populates Available Fields and the Preview table. Use Upload New File to add files to this source. See Manage File Uploads.
- API Endpoints: Select for more information about appending data, replacing data, or deleting data from your file upload.
- Edit File: Select to edit the File Details of your uploaded file.
Join Definition
Create joins between pairs of data entities to create a Fusion source. You must have at least two data entities in source to create a join. If you have more than one data entity in your source, all entities must be used in a join. To create a new join, select Add Join to add a join node to your work area.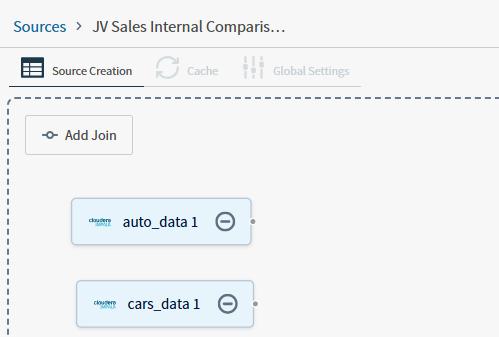
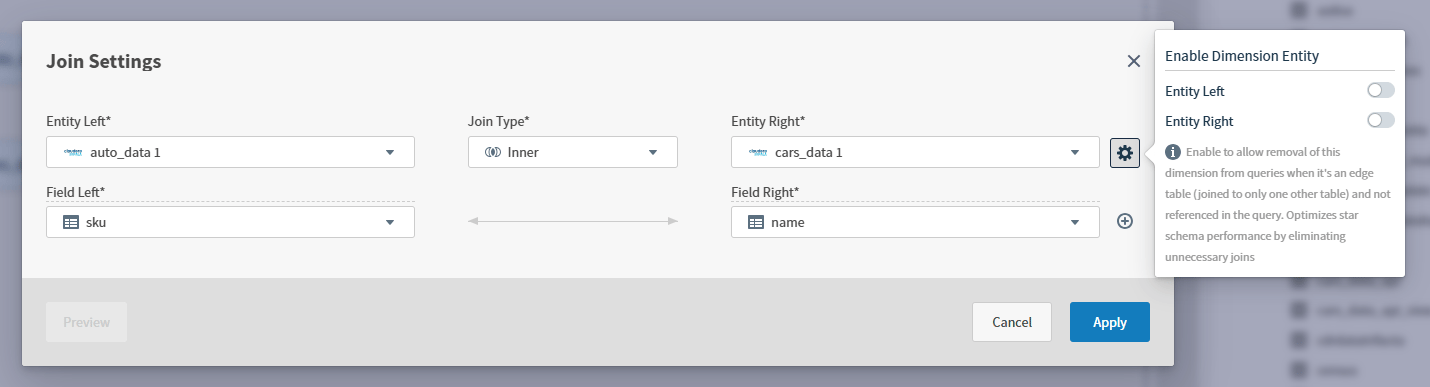
- Entity Left: Select an available entity from the data entities you defined.
- Join Type: Select Left, Inner, or Full Outer.
- Entity Right: Select an available entity from the data entities you defined.
- Enable Dimension Entity: Select the settings icon to enable dimensions for one or both entities. This improves the performance of queries execution by removing unused data entities from the join.
- Field Left: Select at least one field from this entity. You can add multiple fields by selecting the add field button.
- Field Right: Select at least one field from this entity. You can add multiple fields by selecting the add field button.