
- Define Cross-Source Links
- Edit Cross-Source Links
- Remove Cross-Source Links
- Use Cross-Visual Links for Cross-Visual Filtering
Define Cross-Source Links
Cross-source links are defined on the Cross-Source Links tab of the Dashboard Interactions dialog. Each cross-source link on your dashboard must use unique sources and fields. There is a one-to-one relationship between cross-source link names and your data fields. You cannot create multiple cross-source links for the same data field. In addition, you cannot use the same cross-source link name for multiple data fields. Define a cross-source link in a dashboard- Verify that your dashboard includes at least two visuals using different data sources. Cross-source links will not work on dashboards that use only one data source.
-
Select
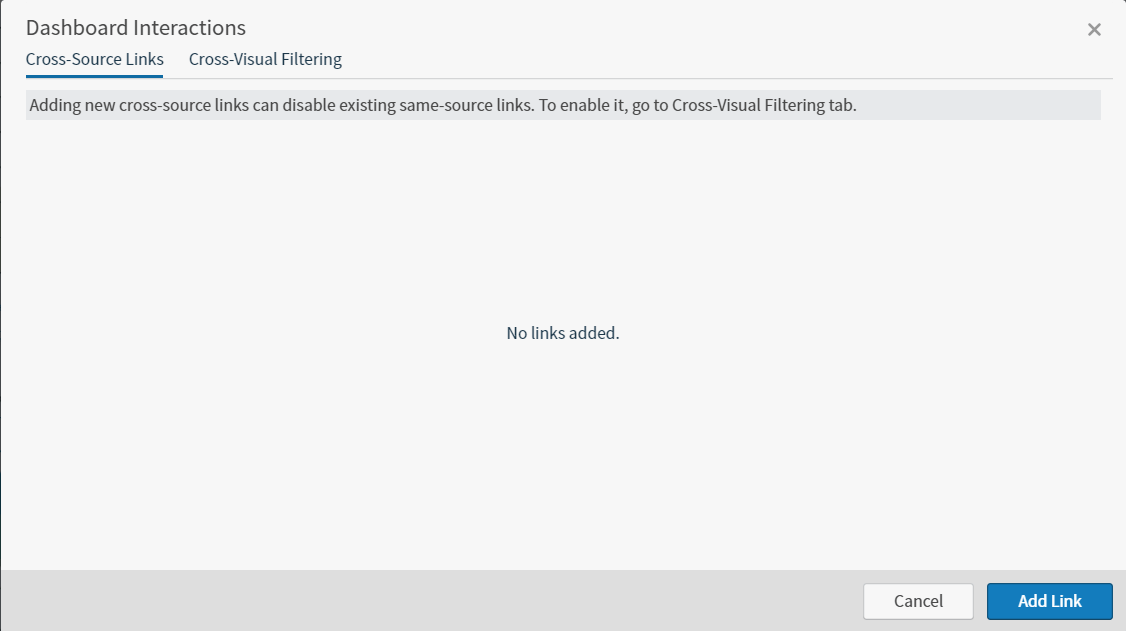
 on the dashboard icon bar. The Dashboard Interactions dialog appears. In the following image, no cross-source links are defined for the dashboard.
-
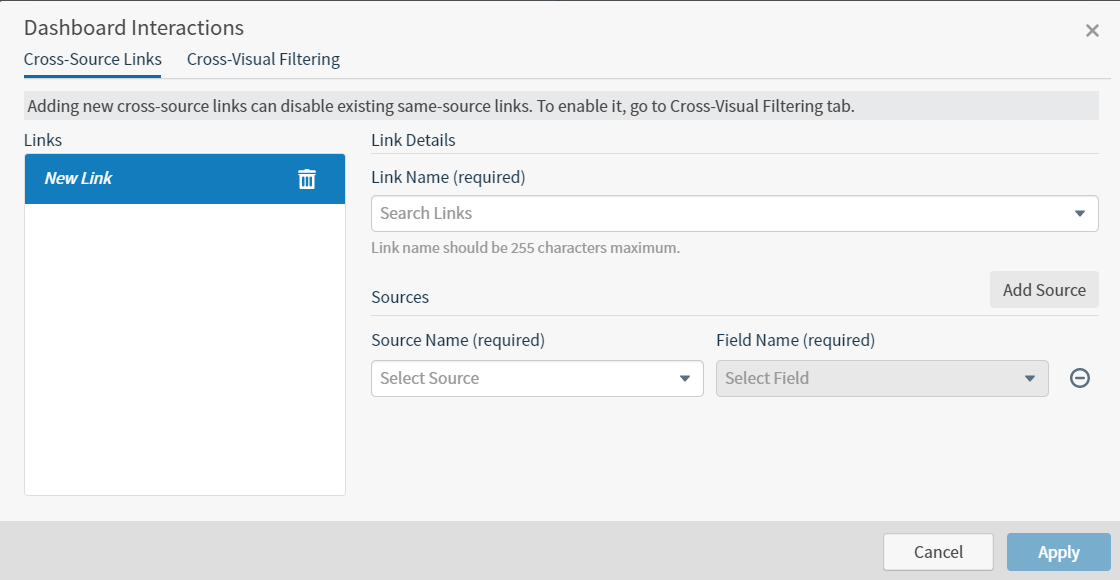
On the Cross-Source Links tab, select Add Link. The tab populates with fields appear to help you define the cross-source link.
-
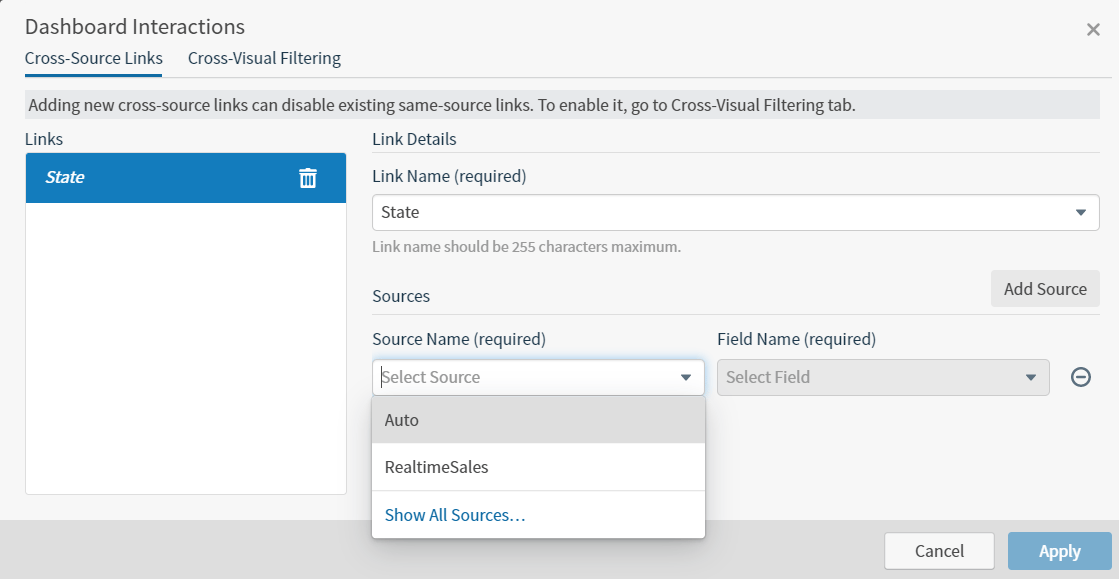
Supply a name for the cross-source link in the Link Name field. When you select the Link Name field to enter a name, a link name list appears listing all the link names that exist on other dashboards in the system. You can use this list to keep your naming consistent across dashboards. Select a name in the list or supply a new one. When you supply a new name the list shows a “Create new link …” option which you must select to create the new link definition. In the example below, you would select Create new link “State” to create the cross-source link definition for the State field.

-
Select a first source using the Source Name drop-down list.
-
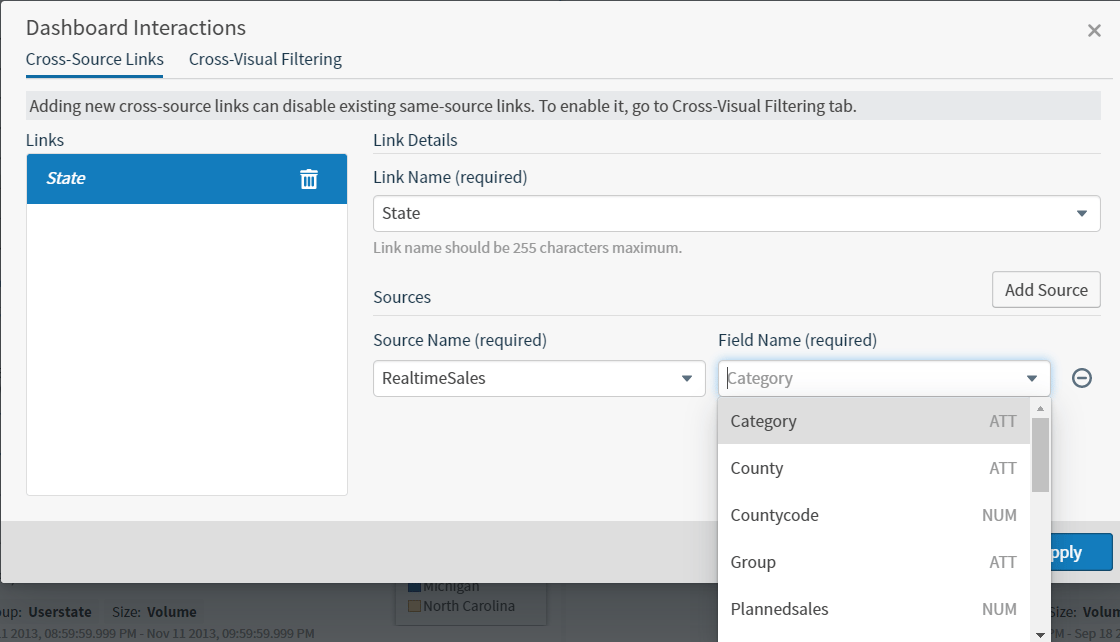
Select a field from the first source using the Field Name drop-down list.
-
Select the Add Source button to add another source for the cross-source link definition. A new row appears in the Sources area of the tab.
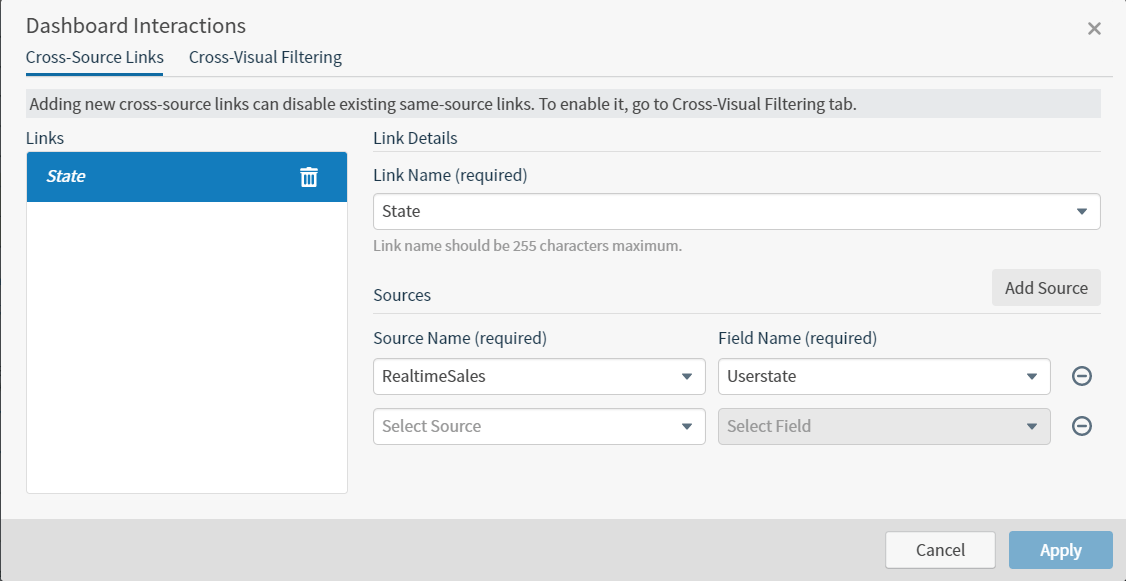
- Select a second source using the Source Name drop-down list in the new row.
- Select a field from the second source using the Field Name drop-down list in the new row.
-
If more than two data sources are used in your dashboard, repeat Steps 7 through 9, as appropriate, to add additional sources and fields to the cross-source link. The fields you select in the sources that comprise a cross-source link should contain the same kind of data.
Self-Service Analytics does not check cross-source links to determine whether they contain the same kind of data. If you do this, the cross-source link will not work.
-
Select Apply. A warning dialog appears prompting you to confirm the creation of the link.
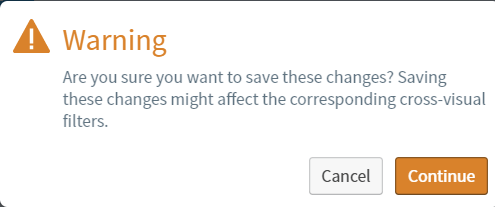 Creating the cross-source link automatically disables any same-source published links for the cross-source linked field. This prevents you from accidentally having duplicate filters. You can, however, re-enable the same-source link later. See Control How Cross-Visual Filters Interact in a Dashboard.
 -
Select Continue. The cross-source link has been created. The non-table visuals in the dashboard that use the sources that are linked and that are grouped by their cross-source linked fields show a
 icon in the upper left corner.
- Save the dashboard to save the cross-source link definition.
Edit Cross-Source Links
Cross-source links can be modified on the Cross-Source Links tab of the Dashboard Interactions dialog. Modify a cross-source link in a dashboard- Open the dashboard containing the cross-source link you want to edit.
-
Select on the dashboard icon bar. The Dashboard Interactions dialog appears. Cross-source links are listed on the Cross-Source Links tab.
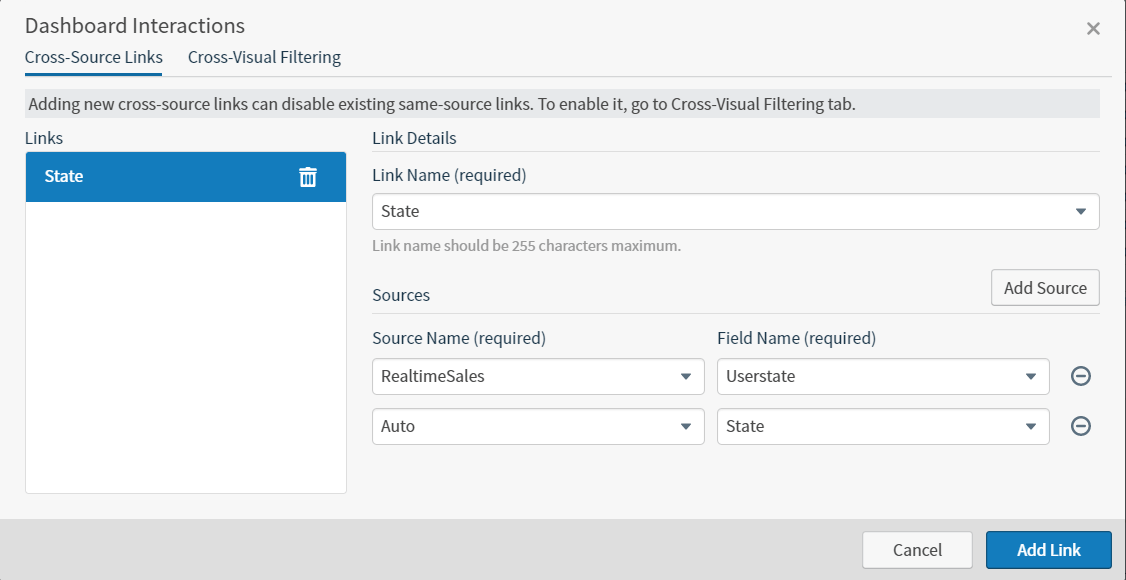
- Select the link you want to modify in the Links list on the left of the tab. Its definition appears on the right.
- Modify the cross-source link definition as needed. See Define Cross-Source Links for detailed information about defining cross-source links.
-
Select Apply. A warning dialog appears prompting you to confirm the link updates.
- Select Continue. The cross-source link is updated.
- Save the dashboard to save the cross-source link definition.
does not check cross-source links to determine whether they contain the same kind of data. If you do this, the cross-source link will not work.
Remove Cross-Source Links
Cross-source links can be removed on the Cross-Source Links tab of the Dashboard Interactions dialog. This will delete the cross-source link definition from the Self-Service Analytics environment. Remove a cross-source link from a dashboard- Open the dashboard containing the cross-source link you want to edit.
-
Select cross source link icon on the dashboard icon bar. The Dashboard Interactions dialog appears. Cross-source links are listed on the Cross-Source Links tab.
- Select the link you want to remove in the Links list on the left of the tab. Its definition appears on the right.
-
Select the trash can icon associated with the link you want to remove. A warning dialog appears prompting you to confirm the deletion.
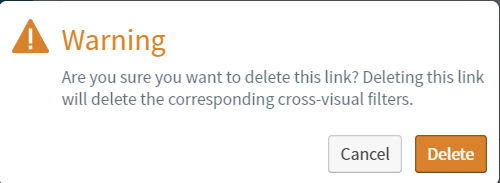
- Select Delete. The cross-source link is removed from the dialog.
- Save the dashboard to delete the cross-source link definition.