
.css to modify the default Self-Service Analytics skin or a custom JavaScript (.js) file to include on every page. This topic guides you in customizing the UI of the installed Self-Service Analytics instance as required.
The customization settings are organized into five categories. Read the following sections for information.
Customize the Application
You can customize the Self-Service Analytics application title and favicon. You can also upload a custom.css to modify the default Self-Service Analytics skin or a custom JavaScript (.js) file to include on every page.
Customize the Application Title
You can customize the Self-Service Analytics application title. The application title is displayed on the tab of your browser window. Customize the application title- Log in as a system admin or a member of the Supervisors group.
- Select Tools > Customize UI from the Administration menu. The Customize UI work area opens.
-
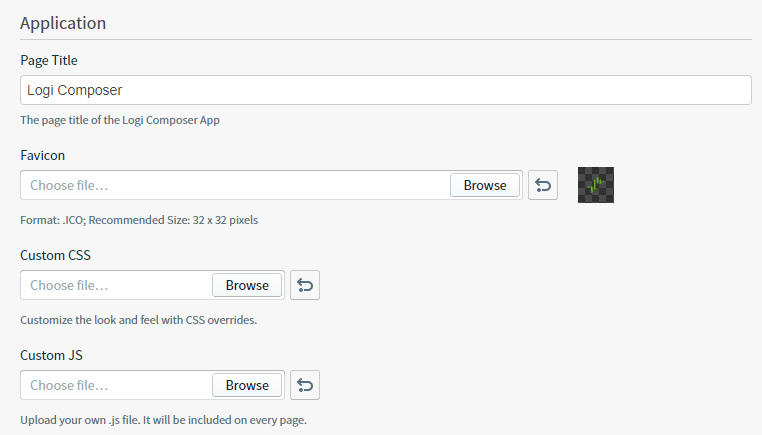
Under Application, locate the Page Title box. Specify a new title in the box. By default, the title is set to Self-Service Analytics.
- Select Save to save and apply your changes.
Customize the Application Favicon
You can customize the favicon used by the Self-Service Analytics application. The favicon is displayed on the tab of your browser window: To customize the application favicon:- Log in as a system admin or a member of the Supervisors group.
- Select Tools > Customize UI from the Administration menu. The Customize UI work area opens.
-
Under Application, locate the Favicon box. Select Browse to browse for and select a new icon. The icon must be in
.icoformat with a recommended size of 32 x 32 pixels. The selected icon is rendered on the Customize UI page after it is selected. - Select Save to save and apply your changes.
Upload a Custom CSS File
A custom CSS file can be uploaded to modify the default Self-Service Analytics skin.insightsoftware recommends you to check the HTML structure of the page to provide the rules for the corresponding selectors in your CSS file. To override existing CSS rules, use
!important.- Log in as a system admin or a member of the Supervisors group.
- Select Tools > Customize UI from the Administration menu. The Customize UI work area opens.
-
Under Application, locate the Custom CSS box. Select Browse to browse for and select a CSS file.
- Select Save to save and apply your changes.
Upload a Custom JS File
A custom JavaScript (.js) file can be uploaded to include on every page of the UI.
Upload a custom JavaScript file
- Log in as a system admin or a member of the Supervisors group.
- Select Tools > Customize UI from the Administration menu. The Customize UI work area opens.
-
Under Application, locate the Custom JS box. Select Browse to browse for and select a JavaScript file.
- Select Save to save and apply your changes.
Customize the Banner
You can customize the UI banner. This includes customizing the default support link, documentation link, and header logo.Customize the Support Link
- Log in as a system admin or a member of the Supervisors group.
- Select Tools > Customize UI from the Administration menu. The Customize UI work area opens.
- Under Banner, locate the Support Link slider. To enable your custom support link, slide the Support Link slider to the right (on). To disable your custom support link, slide the Support Link slider to the left (off). By default the Support Link slider is on.
- Specify the support link in the box below the Support Link slider. By default, the link is set to
https://www.logianalytics.com/support-portal-info. - Select Save to save and apply your changes.
Customize the Documentation Link
- Log in as a system admin or a member of the Supervisors group.
- Select Tools > Customize UI from the Administration menu. The Customize UI work area opens.
- Under Banner, locate the Documentation Link slider. To enable your custom documentation link, slide the Documentation Link slider to the right (on). To disable your custom documentation link, slide the Documentation Link slider to the left (off). By default the Documentation Link slider is on.
- Specify the documentation link in the box below the Documentation Link slider. By default, the link is set to
https://documentation.logianalytics.com/composerltsactive/default.htm. - Select Save to save and apply your changes.
Customize the Header Logo
You can change the header logo. It appears on the banner of the Self-Service Analytics work area.- Log in as a system admin or a member of the Supervisors group.
- Select Tools > Customize UI from the Administration menu. The Customize UI work area opens.
-
Under Banner, locate the Header Logo box. Select Browse to browse for and select a new logo. The logo must be in
.svgor.pngformat with a transparent background. It can have a maximum height of 72 pixels. The selected logo is rendered on the Customize UI page after it is selected. - Select Save to save and apply your changes.
Customize the Header
You can add custom header for each page of the Self-Service Analytics UI. You can also specify the header height. The header appears above the Self-Service Analytics banner in the UI. Customize the header:-
Log in as a system admin or a member of the Supervisors group.
The default supervisor user is no longer installed; add users to the Supervisors group instead.
-
Select Tools > Customize UI from the Administration menu. The Customize UI work area opens. The following screen shows all the custom header settings on the page.
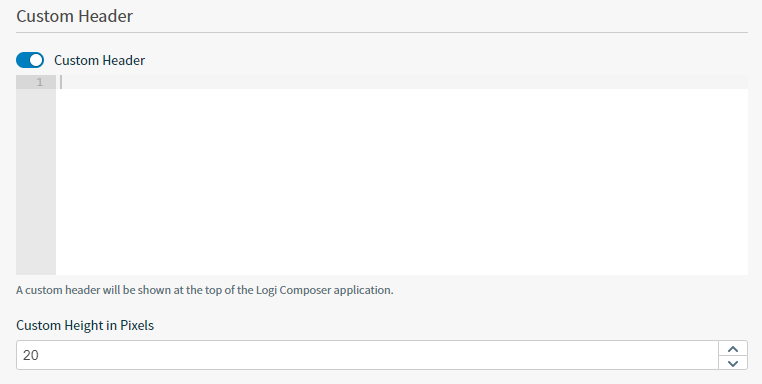
- Under Custom Header, enable the custom header by sliding the Custom Header slider to the right (on). You can always disable the custom header by sliding the Custom Header slider to the left (off). By default, the custom header is off.
- In the box under the Custom Header slider, specify HTML structures for your custom header. You can either add inline styles or include the classes corresponding to your custom CSS file.
- In the Custom Height in Pixels box, specify the height (in pixels) of the header. You can use the up and down arrows in the box to increment and decrement this value or you can type a value in the box.
- Select Save to save and apply your changes. The header appears above the Self-Service Analytics banner in the UI.
Customize the Footer
You can add custom footer for each page of the Self-Service Analytics UI. You can also specify the footer height. The footer appears below the normal Self-Service Analytics UI page. To customize the footer:- Log in as a system admin or a member of the Supervisors group.
-
Select Tools > Customize UI from the Administration menu. The Customize UI work area opens. The following screen shows all the custom footer settings on the page.
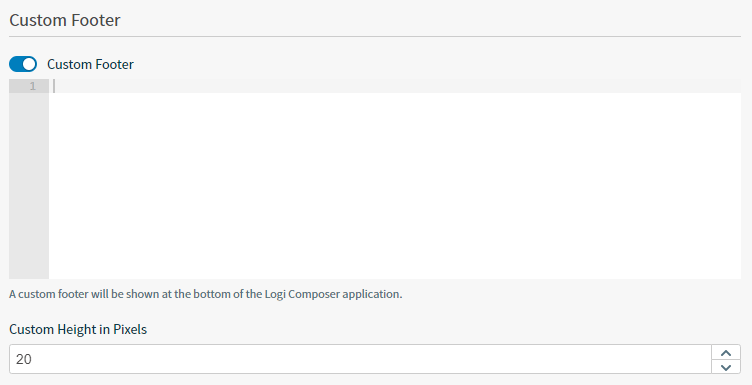
- Under Custom Footer, enable the custom footer by sliding the Custom Footer slider to the right (on). You can always disable the custom footer by sliding the Custom Footer slider to the left (off). By default, the custom footer is off.
- In the box under the Custom Footer slider, specify HTML structures for your custom footer. You can either add inline styles or include the classes corresponding to your custom CSS file.
- In the Custom Height in Pixels box, specify the height (in pixels) of the footer. You can use the up and down arrows in the box to increment and decrement this value or you can type a value in the box.
- Select Save to save and apply your changes. The footer appears below the normal Self-Service Analytics UI page.
Customize the Login Dialog, Home Page Background, and About Dialog
You can customize the copyright information, terms of service link, Login screen logo, the Login screen background, and the Home screen background. The logo, copyright, and terms of service appear in the About dialog of the UI. The copyright information, Login screen logo, and Login screen background appear with the Login screen. The Home screen background appears on the Home page.Customize the Copyright Information
The copyright information appears on both the About dialog and the Login dialog. By default, standard Self-Service Analytics copyright information is displayed.- Log in as a system admin or a member of the Supervisors group.
- Select Tools > Customize UI from the Administration menu. The Customize UI work area opens.
-
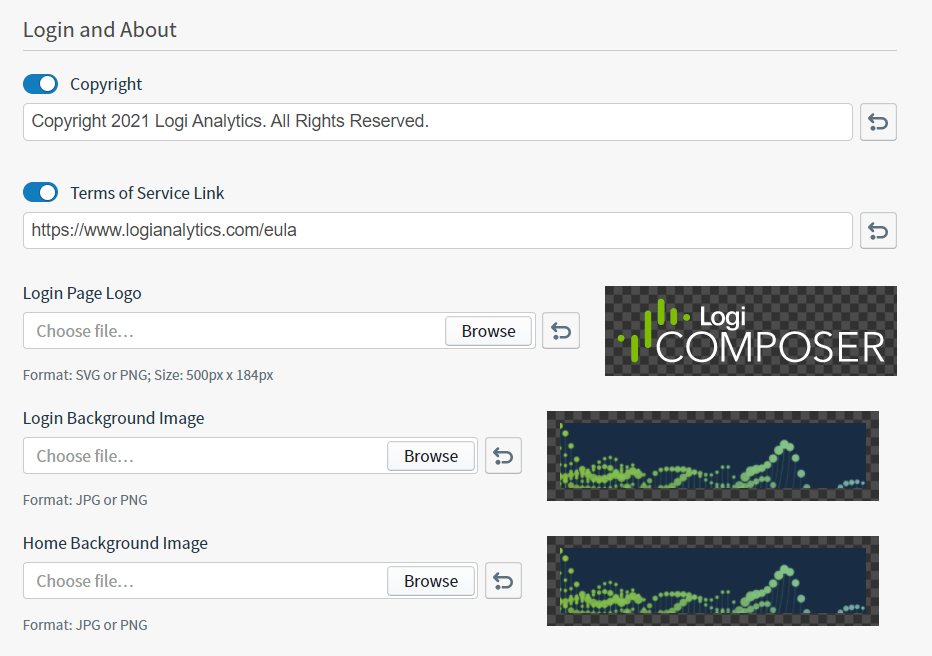
Under Login and About , locate the Copyright slider and box. To enable your custom copyright, slide the Copyright slider to the right (on). To disable your custom copyright, slide the Copyright slider to the left (off). By default the Copyright slider is on.
 s
s
- In the box below the Copyright slider, specify your custom copyright information.
- Select Save to save and apply your changes.
Customize the Terms of Service Link
The terms of service link appears on the About dialog.- Log in as a system admin or a member of the Supervisors group.
- Select Tools > Customize UI from the Administration menu. The Customize UI work area opens.
-
Under Login and About , locate the Terms of Service Link slider and box. To enable your custom link, slide the Terms of Service Link slider to the right (on). To disable your custom link, slide the Terms of Service Link slider to the left (off). By default the Terms of Service Link slider is on.
-
In the box below the Terms of Service Link slider, specify your custom terms of service link. By default, the link is
https://www.logianalytics.com/eula. - Select Save to save and apply your changes.
Customize the About and Login Logos
The logo appears on both the About dialog and the Login dialog.- Log in as a system admin or a member of the Supervisors group.
- Select Tools > Customize UI from the Administration menu. The Customize UI work area opens.
-
Under Login and About , locate the Login Page Logo field. Select Browse to browse for and select a new logo. The logo must be in
.svgor.pngformat with a transparent background. In addition, it must be 500 pixels wide and 184 pixels high. - Select Save to save and apply your changes.
Customize the Login Dialog Background Image
The background image appears on the Login dialog.- Log in as a system admin or a member of the Supervisors group.
- Select Tools > Customize UI from the Administration menu. The Customize UI work area opens.
-
Under Login and About , locate the Login Background Image field. Select Browse to browse for and select a new background image. The image must be in
.jpgor.pngformat with a transparent background. In addition, it must be 2560 pixels wide and 1600 pixels high. - Select Save to save and apply your changes.
Customize the Home Page Background Image
The background image appears on the Home page.- Log in as a system admin or a member of the Supervisors group.
- Select Tools > Customize UI from the Administration menu. The Customize UI work area opens.
-
Under Login and About , locate the Home Background Image field. Select Browse to browse for and select a new background image. The image must be in
.jpgor.pngformat with a transparent background. The selected image is rendered on the Customize UI page after it is selected. - Select Save to save and apply your changes.
Change the Login Page
You can change the Login page of your Self-Service Analytics environment from the default values by uploading a custom CSS file. This enables you to use your organization’s color scheme and branding not only on the background image, but on the background animation, login box, and button. This topic describes:Change the Login Page Background Gradient

Change the Login Dialog
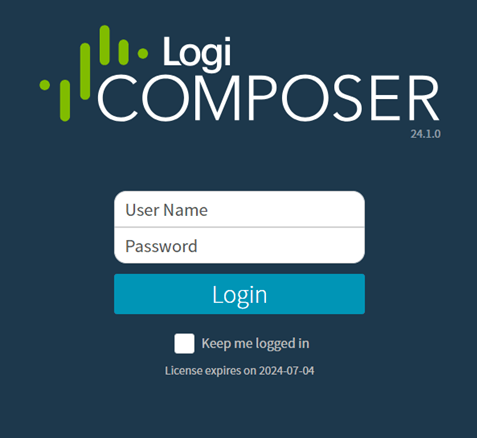
Change the Login Button Color

Change the Library
By customizing how the Self-Service Analytics library looks, you style the look-and-feel of your tenant’s user interface. By changing the outline colors, background colors, icons, and fonts, the library can take on a whole new look. This topic provides the following tools for you to use:- Background color of the library
- Library side pane
- Background for My Favorites section of the library
Change the Library Background Color
You can change the background color of the library within your tenant account(s) to match your particular design needs. Use the selector illustrated below:Change the Library Side Pane
You can change the color of the main menu pane. This menu is displayed both in the dashboard library, the self service reports library, as well as within visuals and dashboards. Use the selector illustrated below:Change the My Favorites Background
You can change the background color of the My Favorites section within the library. Use the selector illustrated below:White Label the Self-Service Analytics Interface
Self-Service Analytics provides ways you can change the default UI settings for the interface. If you prefer more customization options, upload a custom CSS file that includes the changes you want to apply to the interface. If you want to change the default logo, copyright information, or help content see Customize the User Interface. The white labeling capabilities are described here to help you understand the extent of control of customizations you as a developer have over the look-and-feel of the interface your users see and interact with.The Self-Service Analytics user interface is often enhanced between releases and those enhancements may affect the application’s CSS. You should plan time to update your custom CSS between version upgrades.
What Can I Do With White Labeling?
- Make the Self-Service Analytics Login page look like your company
- Re-theme banners, backgrounds, and tiles for the Home Page
- Change the colors within the Self-Service Analytics client
- Translate the text into other languages. Work with your insightsoftware technical support representative to do this.
What Do I Need?
- System admin access to the tenant account(s) you want to customize
- Familiarity with CSS
Where Do I Get Started?
Translate the Self-Service Analytics Interface
You can translate the Self-Service Analytics interface into other languages. Self-Service Analytics supports standard i18n languages. See https://perldoc.perl.org/I18N::LangTags::List#LIST-OF-LANGUAGES.To translate the interface, you must have a specific advanced setting switched on. Please contact technical support for information about this setting.
vocabulary-<xx>_<YY>.json are used in the translation. The English translation file is provided and is named vocabulary-en_US.json.
- Linux Environments: Located in the
/opt/zoomdata/client/i18nfolder. - Windows Environments: Located in the
<install-path>/client/i18nfolder.
-
Locate and copy the provided English translation file
vocabulary-en_US.jsonin the appropriate/client/i18nfolder. -
Rename the copy of the file. Be sure to name it in the format
vocabulary-<xx>_<YY>.json, where<xx>is a two-character code representing the language you want to use and<YY>is the dialect. See https://perldoc.perl.org/I18N::LangTags::List#LIST-OF-LANGUAGES. -
Translate the JSON values to the right of the JSON keys (after the colon) in the file. All values should be specified in quotes. The JSON keys should not be translated because the keys are used by the Self-Service Analytics code.
Here is an example of part of a translated translation file:
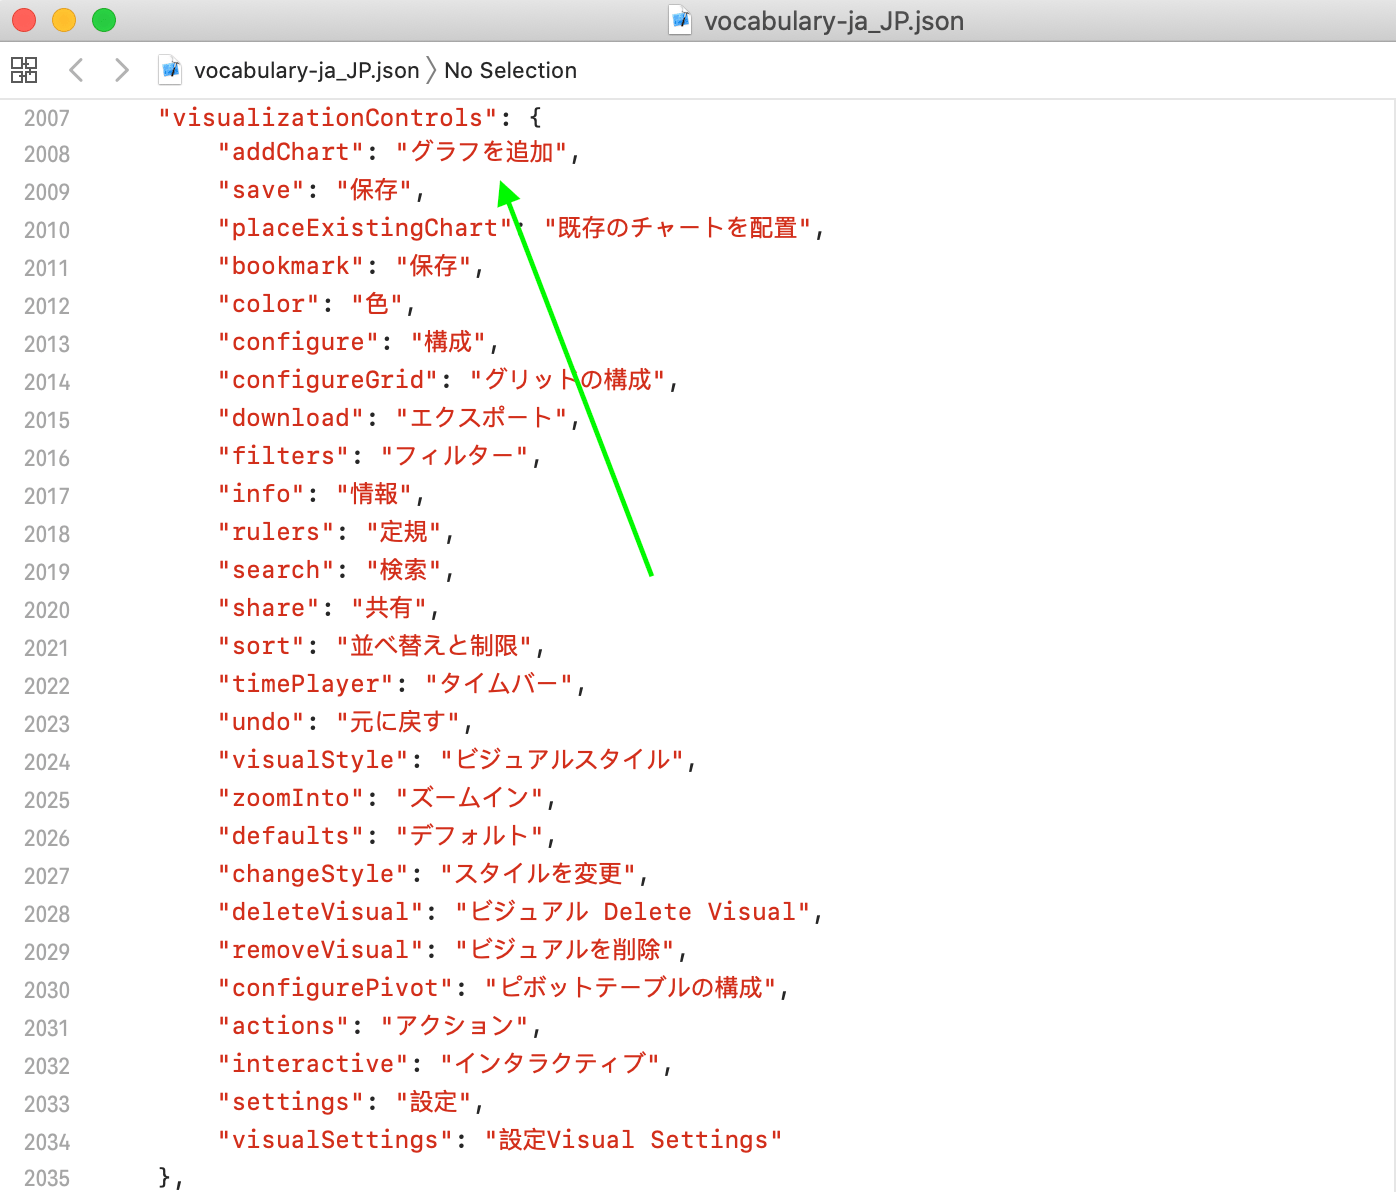
<b>and</b>around a JSON value or part of a value indicate that the value should be bold. Finally, placeholders (variables) are used throughout the file and should not be changed or removed, although they can be relocated within a JSON value, as needed for your translation. Placeholders appear surrounded by%symbols (for example,%name%) in the translation file. Self-Service Analytics code inserts a value for these placeholders, based on where the JSON key is used in the product. For example, a dashboard name might be inserted for the placeholder%name%for one JSON key, but a visual name might be inserted for a different JSON key that also uses the%name%placeholder. - Save your translated file.
- Contact your insightsoftware technical support representative for additional steps.
If you import an exported source that has an associated translation file, you must re-upload the translation for that source.